In my previous post I showed you 5 easy hair styles inspired by our Bollywood Divas. This is the second post we are doing in collaboration with BBLUNT. In this series I’d share some work appropriate tutorials with you that could be done easily and in no time. All you need is right products and a little practise. You could easily get that salon like finish and flaunt your styles to your colleagues using these BBLUNT products. I hope you give these a try. 🙂

1. Sleek hair with braided front.
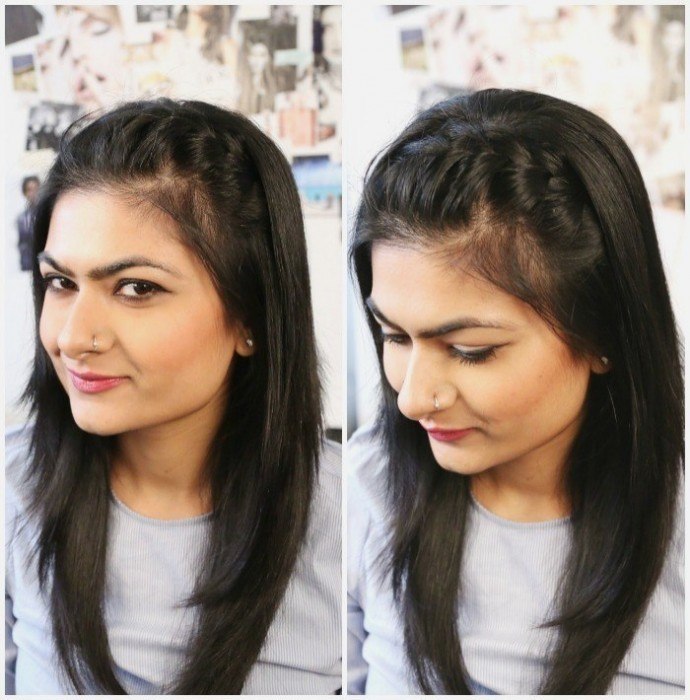
- Use BBLUNT Blown Away Volumizing Leave-in Spray on the roots of your hair so that your hair still has volume even though your are going for a sleeker look. You don’t want your hair to look flat or weighed down.
- Straighten your hair using BBLUNT Liner II Professional Hair Straightener.
- Partition your hair using the end of a tail comb.
- Section the hair from the crown of your head and pin them separately.
- Now start braiding the front section of your hair.
- Keep adding hair both from the front and back as your braid sidewards.
- Once you are happy with how long your want your braid to be, just pin it at the back.
- Open the rest of your hair and finish off with BBLUNT Spotlight Hair Polish for shine and gloss. 🙂

2. Twists and Turns : These twist and turn hair styles are my personal favourite. They take least amount of time and still look like your have spent so much time at doing your hair.
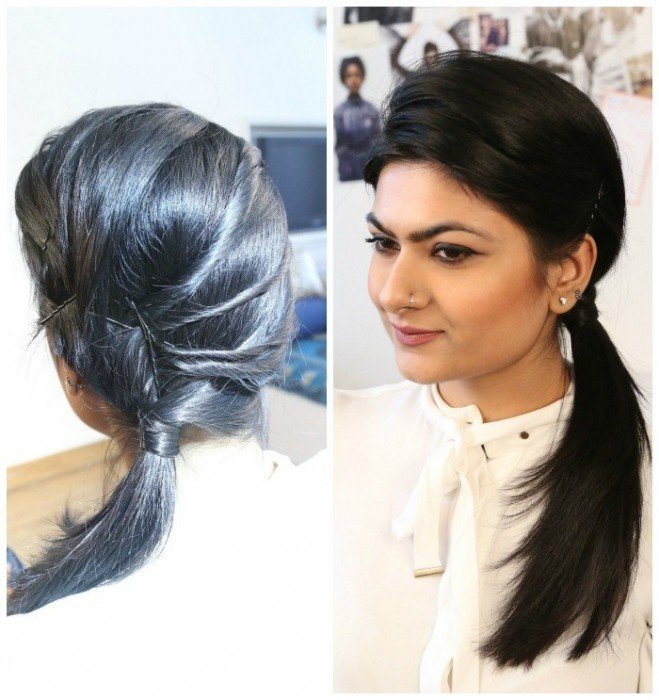
- Start by spraying BBLUNT Back to Life Dry Shampoo at the roots of your hair. This would freshen up your scalp and add a bit of texture to the hair.Dry Shampoo is a new concept and it’s great for busy days, when you don’t have the time to shampoo all you need to do is spray it on your roots from a 6 inch distance and your greasy, oily roots will look fresh.
- Straighten your hair using BBLUNT Liner II Professional Hair Straightener
- Pin the front section of your hair on the side you want your parting to be.
- Take some hair from the same side you have parted your hair and start twisting them.
- Pin the end of the twist at the back of your hair. Make 2-3 twists or depending on your hair length or volume, you could make more.
- Now take a thin section of hair from the very bottom.
- Twist thats section around the hair on one side. If you have thicker hair, secure your side pony with a hair-tie and then cover the hair tie with the section of hair.
- Finish off by fixing the baby hair using BBLUNT IT MATTERS Zero Shine Moulding Clay.This clay will fix the fly aways giving it a matte look.
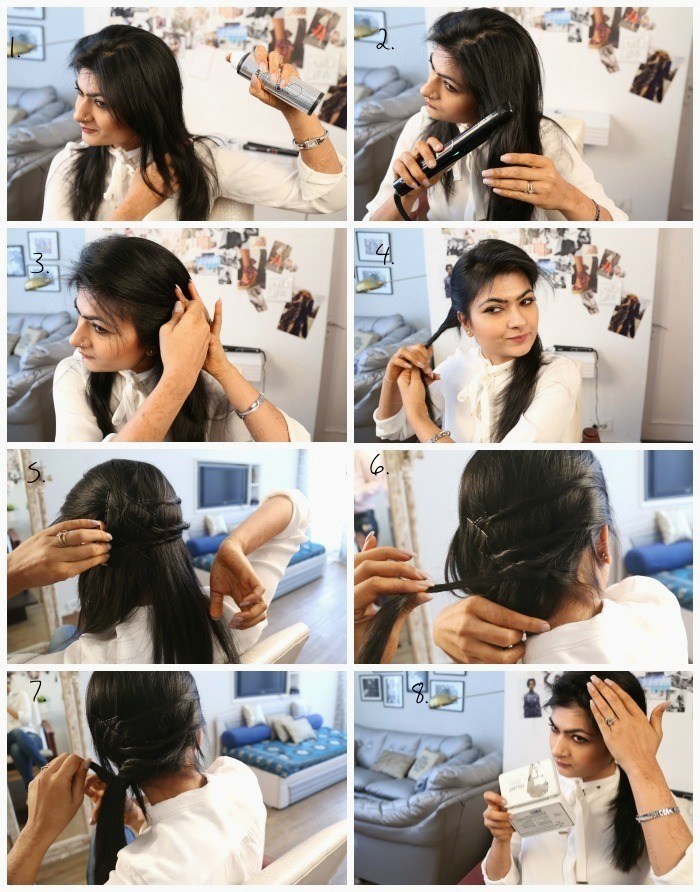
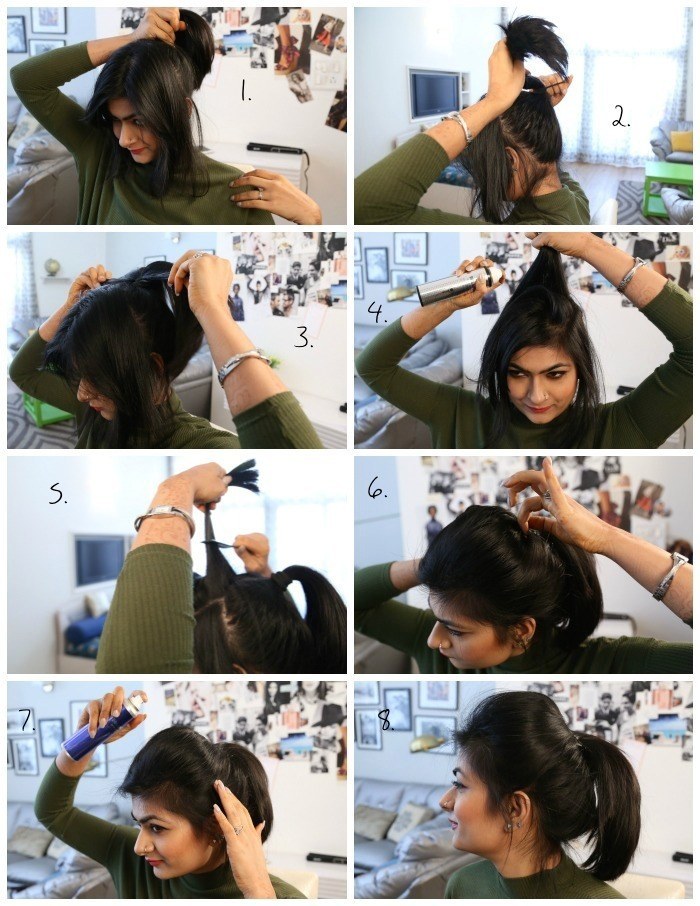
3. Poofy Ponytail
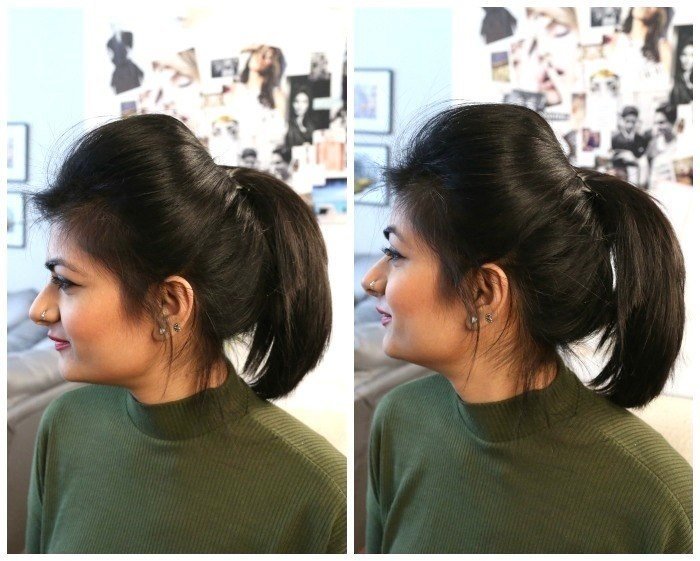
- Section your hair. Leave one fourth of front hair and make a ponytail with the rest of the hair.
- Secure the pony with a hair tie.
- Fluff the hair by gently pulling the pony apart from both the sides.
- Now spray BBLUNT Back to Life Dry Shampoo on front section of your hair before you style it and to create texture and add some volume.
- Back comb the front section of your hair to create volume .
- Pin all the hair back using bobby pins. Make sure not to flatten your hair by pressing them down.
- Finish off by spraying BBLUNT Hair Polish for that extra gloss and shine to your hair to set your do in its place.
- Done! 🙂
4. Volumized Low Bun : I am a huge fan of hair buns. Sometimes I go for high buns, sometimes messy and sometimes low buns. Especially for office environment, I feel buns make a really great option for looking professional.
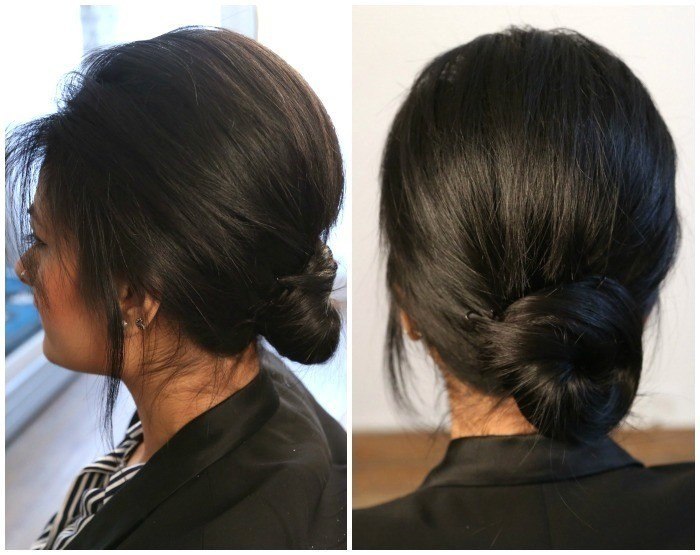
- Start by spraying BBLUNT Back to Life Dry Shampoo to your hair. This will revamp your hair by soaking up the grease and grime.
- Back-comb the entire front section of your hair.
- It is okay even if your look crazy. Just keep going. 😛
- Secure the end of your hair in a low ponytail.
- Now twist the ponytail in a bun and secure the bun with bobby pins and bun pins.
- Done! 🙂

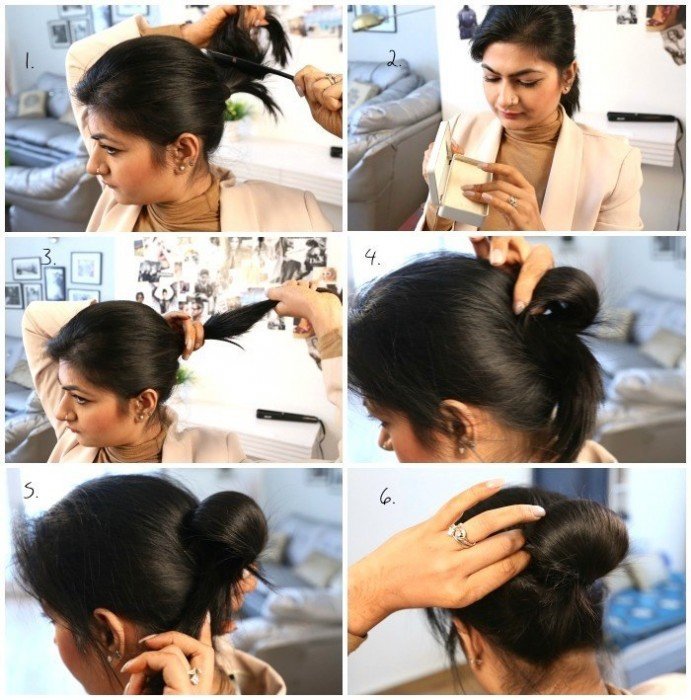
5. Polished Round Bun : Even if you don’t have long thick hair, you can still create a lovely polished bun. It’s a secret. 😀
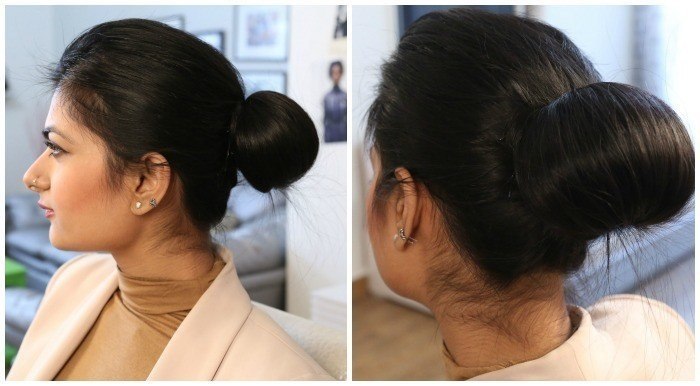
- Start by tying your hair in a ponytail. Back comb the ponytail using a tail comb.
- Take a little BBLUNt Moulding Wax in your finger tips.
- Run the wax through your hair. This would take care of any fly-aways and would help in creating a neat bun.
- Here’s a trick to create a big round bun. Make a little loop with some of your hair in a ponytail and pin it outward- inward.
- Now pin the rest of your hair around that loop.
- This bun would look even neater if you don’t have layers in your hair such as mine. But now worries, a few hair coming out of the bun here and there is just fine.
I surely had a lot of fun creating these 5 sophisticated hairstyles appropriate for any formal
and professional situation. And thanks to our hair-styling experts BBLUNT, these are made so easy to achieve at home in 10 minutes or less!
Tell us which ones of these you liked best in the comments, and if there’s any other style you would like me to experiment with. If it works, I’ll quickly share a tutorial with you all.
Wish you all a Merry Christmas! :))
Until next time!


![Sandwiches_for_weight_loss[1]](https://makeupandbeauty.com/wp-content/uploads/2024/04/Sandwiches_for_weight_loss1.jpg)
Wooowwww … i love i love … 3rd and 4th are my favourite …. and Merry Christmas… waiting for ur russia pics … enjoyy ur trip…
Every hairstyle is superb, I love the way you have done tutorials for each and every hairstyle :* and you look so happy doing them – it shows!!!! My favorite is twist and turns,…..soooper it is Rati :*
Adorable hair styles, Rati! How I wish I can learn them 🙁
Loved all the looks on you, but Sleek hair with braided front is my most fav here. It is so chic.
Loved all the hairstyles on u..
u r such a pretty lady…
🙂
Loved all the styles Rati. The first 2 were ultra chic – I’m definitely trying that!
I love the last hairstyle Rati. I have long but silky hair and I can never put it into a bun. I will try this one for sure.
Happy holidays. Wish you and Sanjeev ji a great trip and a very Happy New Year.