Do you want to be the girl who uses beauty blender that are unclean and full of dirt and bacteria? Did you ever wonder why do you get unwanted breakouts and pimples when you use beauty blenders? Undoubtedly, beauty blenders have made blending of makeup products a breezy job, but these cult beauty tool also needs pampering from time to time. Beauty Blender has revolutionized the makeup game and it’s an easy job to achieve flawless and seamless makeup with a blender in hand. However, to avoid unwanted skin infection, beauty blenders need to be thoroughly cleansed because they attract a lot of dirt, grime and bacteria, hence the wisest choice would be to clean them properly after every use. If you still don’t know how to keep your beauty blenders clean by washing them properly, here’s a complete guide detailing the right way to do so.

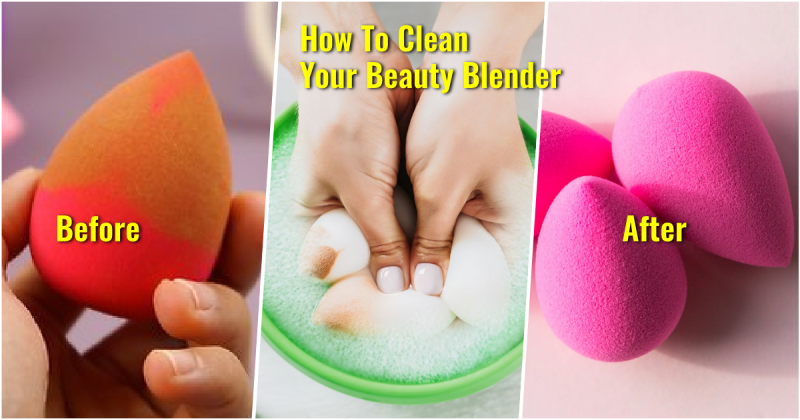
1. Cleaning with water and liquid soap: The most common way to clean a Beauty Blender is to wash it with warm water and a mild cleansing liquid like a baby shampoo or a gentle organic shampoo. Don’t use dish washing liquid to clean beauty blenders as they might be harsh for the skin, dry out skin, and cause infections. Fill a bowl with warm water and add a few drops of liquid soap in that water. Mix it well to form a soapy solution and submerge the dirty sponge in the solution. Dip the Beauty Blender 2-3 times in this liquid. Squeeze out excess water from the blending sponge. Now, soak the sponge in that solution for about 30 minutes. This will expand the blender in size. In order to remove heavy makeup from certain sections of the sponge, gently massage the cleanser on it with your finger tips for a few minutes. Now, it’s time to rinse out the sponge to make it soap free. Hold the blender under tepid tap water until all soapy cleanser drains out and the water runs clear. When you see rinsing the water running clear beneath the sponge, it would mean your Beauty Blender is finally clean. To remove excess water from the sponge, squeeze it and then dry it with some dry cloth or towel. If you still find it to be wet, keep it at an air drying place and wait for it to dry out completely. This method is mostly suitable for basic cleansing of your Beauty Blender.
2. Deep cleansing with paper towel: If you are not satisfied with basic cleansing of Beauty Blender and still find it to be dim, try out the deep cleansing method to clean it properly. This method of cleansing is mostly needed if you use your Beauty Blender multiple times a day which results in heavy pilling of makeup on the sponge. In this method, warm water is used just like the previous method. Initially, you have to hold the sponge under warm running water for about a minute. This will expand the size of this blender to its maximum. You do not need to put any liquid soap or baby shampoo in the warm water for this method. Instead, apply baby shampoo or mild organic shampoo directly to the heavily soiled areas of the sponge. Rub the sponge against the center of your hands in small circular motions for about a minute or two. This rubbing of the sponge should be gentle enough so as to prevent any distortion of the makeup sponge. Now, hold the sponge in warm, rinsing water and continue to rub it against your palms until all the suds from the beauty blender gets drained out properly. This process might take a few minutes as you will need to make the sponge completely soap-free before any further use. Now, it is time to analyze if your sponge is completely clean. For this, squeeze out excess water from the blending sponge and check if it is clean. If you find the resulting water to be clean, then your sponge is washed properly. However, if the water that gets squeezed out turns beige, you would need to repeat the above procedure again to get rid of the excess makeup. Having done all the steps well, the last step is to dry the blender. Squeeze the excess water from the sponge and roll it over dry paper towels to dry it further. In case, you still find it to be wet, keep it in an open space with ample sunlight and allow it to dry for 24 hours.

3. Heat sterilization using a microwave bowl: Even though you follow the basic cleansing routine to clean your beauty blender, it becomes necessary to heat sterilize your blending sponge once in a month to remove bacteria and germs from the deeper layers of the sponge that do not come off easily with normal cleansing. If you note unwanted breakouts on your skin more frequently, then it’s time for you to treat your beauty blender with some intense burst of heat. To do this, fill in a micro-safe bowl with water and put the blending sponge in the middle of the water puddle. You must never apply microwave heat on an entirely dry sponge as this might distort the shape of the beauty blender. Put the bowl in the microwave bowl in the appliance for about 30 seconds and run the microwave device at full power. Keep an eye on the sponge when this process goes on. The beauty blender might expand during this process, but there is nothing to panic about it. You will find the sponge to be really hot when the microwave cycle ends. So, wait for some time before removing the sponge from the bowl. Remove the sponge from the bowl as soon as it is cold enough to touch with bare hands. Now, it is time to dry your sponge well. Roll it on a dry paper towel and pat it dry. To make it dry completely, let it sit at room temperature for some time. Once it gets dried completely, you can use it again for makeup application.
If you want to extend the longevity of your beauty blender, it is extremely important to clean it on a regular basis. This will not only help to keep the blending sponge clean, it would also keep your skin zit and acne free. The best deal to clean your beauty blender is to use the original Beauty Blender Cleansing Solution (Liquid Blendercleanser). However, if budget is a concern for you, a baby shampoo or a gentle shampoo would also do well. In addition to that, store the blending sponges in ventilated pouches instead of a makeup bag or plastic bag, so that the sponge can breathe. Also, you must consider replacing your beauty blender every three months if you use it frequently. Now, treat your blender well and it will keep blend your makeup perfectly!
How To Use A Beauty Blender For Concealer
How To Use Beauty Blender With Liquid Foundation
How To Use A Beauty Blender To Contour
Beauty Blender Sponge

