 Hello, beauties!

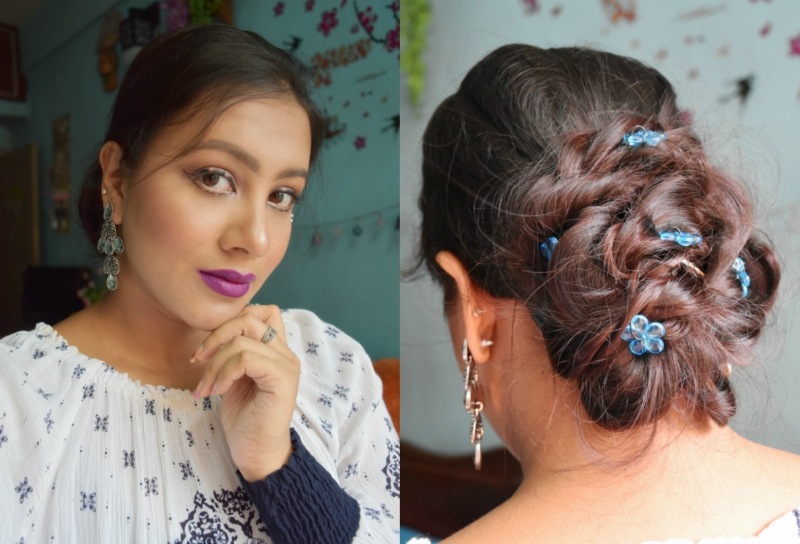
Buns always carry a very elegant and classy look and give a fine polished look to any outfit. I love messy bun, which defines me the best, but today, I thought to do something different and new on me. Though my hair is long, it is quite thin, so I always need to add volume to my hairstyle and that’s why I decided to create a classy twisted bun. It is super easy to create and also takes less time. If you are going to a party and don’t have much time, then it will give you that easy finishing touch and will actually look super cute. Now, let’s get into the step-by-step detailed tutorial.
Step 1:
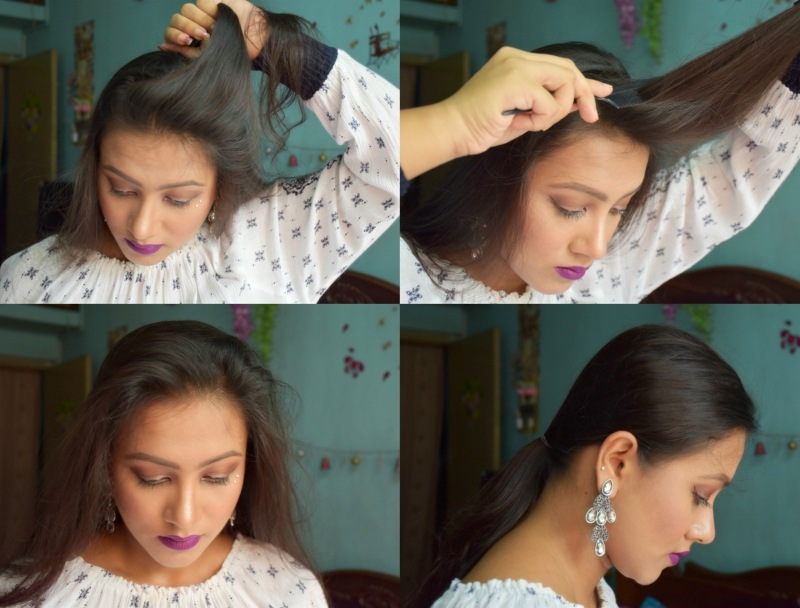
First, you need to brush your hair well and then take the front section of your hair and finely backcomb the inner side, and again, take a section from the front and backcomb that section to get the volume. If you have limp hair, then it gives a nice volume to the hair and hair doesn’t look too flat.
Step 2:
Once you are done with all the front sections, lightly brush the upper hair and create a normal ponytail at the back.
Step 3:

After that, divide that ponytail into three sections. Now, twist the first section nicely and slightly pull up the edges of the twist to make it look fuller. Then wrap it clockwise on the back and nicely secure the section with bobby pins. You must secure the end carefully so that it stays in place for long.
Step 4:
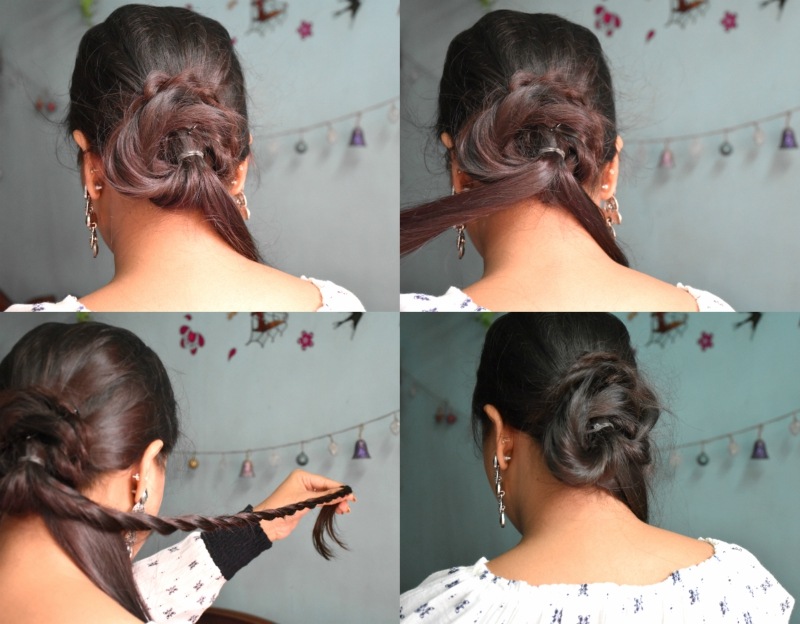
Do the same with other sections. Normally twist the hair strand and again wrap that section around the previous one. Make sure you don’t overlap a lot of sections. Now, again, secure it with bobby pins at the back.
Step 5:
Follow the step 3 and do the same with the 3rd section and coil the tail of the last section into the center. Secure it with bobby pins. Make sure you put some extra bobby pins to secure them tightly. In this way, you will get a nice round bun.
Step 6:
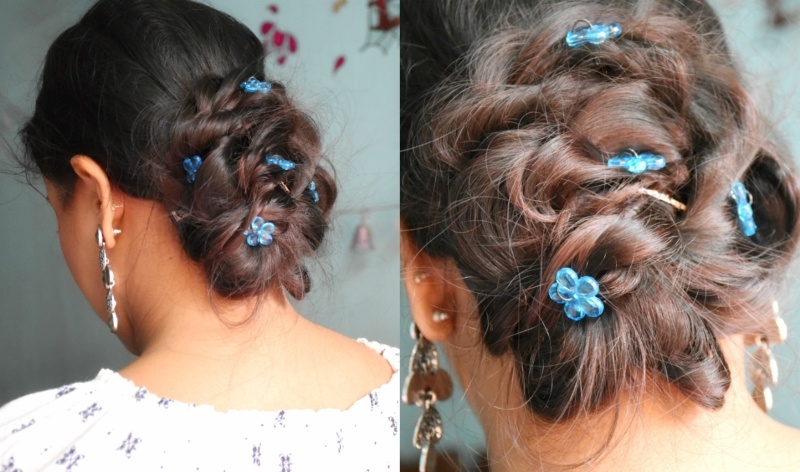
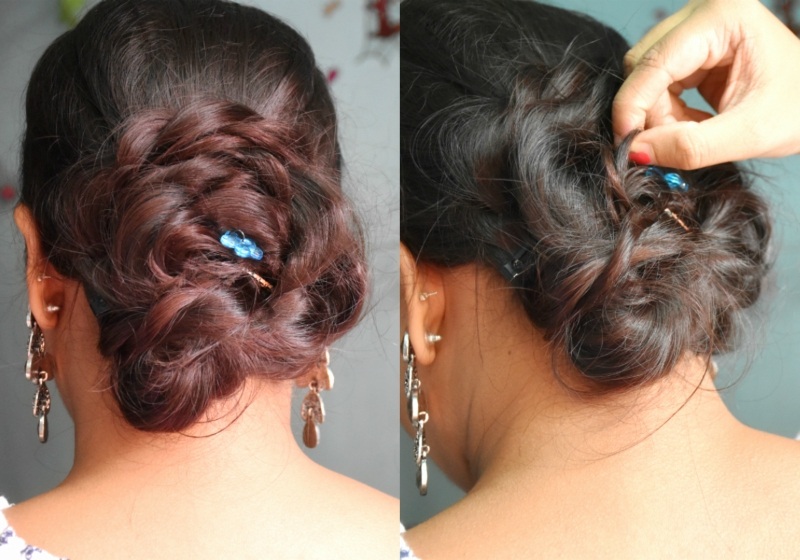
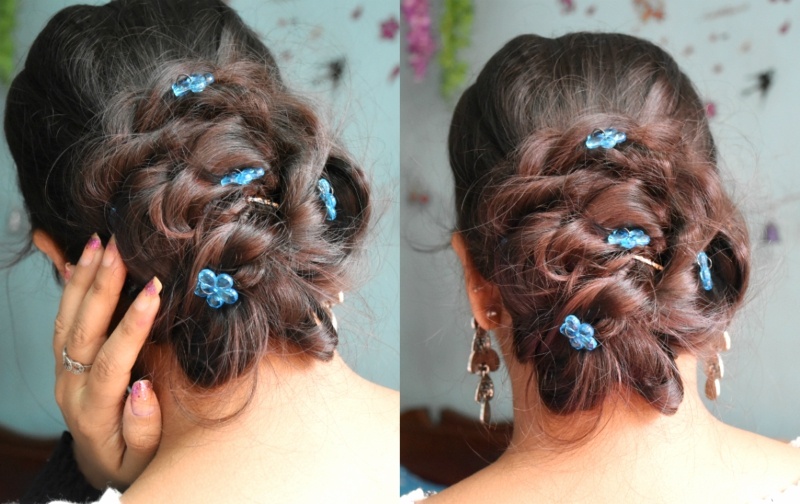
Once you are done, then slightly tug the bun to get a fuller look. You can keep it simple, and for occasions, you can use some hair accessories. I really love them as they make the bun beautiful.
Step 7:
To set the hairstyle for long, apply some hair setting spray and you are sorted with a beautiful classy twisted bun.

Here is my complete look. I kept my front section very normal. If you have bangs, then you can pin them up or simply leave them. I prefer a nice polished look. It is super easy to create and perfect for all occasions. Also, it will look great at weddings as well, and for that, you can use some flowers on it. I love this bun which brings a new look and is a great alternative hairstyle.
Step-by-Step Hair Tutorial – Casual Long Fishtail Braid
Step-by-Step Hair Tutorial – Soft Romantic Bubble Ponytail
Step-by-Step Hair Tutorial – How to get Heatless Soft Curls
Summer-Perfect Twisted Knot Hairstyle Tutorial
Bold Block Eyeliner Makeup – Step-by-Step Tutorial
Fresh Pastel Eye Makeup Look – Step-by-Step Tutorial
Step-by-Step Eye Makeup Tutorial – Blue Bold and Sparkling Smokey Eyes
Step-by-Step Tutorial for the 10-Minute Natural and Glowy Day Makeup Look
My Signature Messy Bun Tutorial
Flower Bun Tutorial – Hairstyle for Everyday and Party
Makeup and Hairstyle Tips to Look Mature and Sophisticated
8 Hairstyle Mistakes That Make You Look Older
Deepika Padukone’s Best Hairstyles


That bun is so damn pretty.. Never thought it was so easy to do it .. 🙂 you are doing some amazing and super easy tutorials ..keep up the good work 🙂
Thank you Saloni ?? exactly , in pictures they look quite complicated but actually these are so easy.. ??
This is so nice. I have always despaired of getting my hair into a bun because of the length and since it’s so silky. But I think this will work! And you explain it in such an easy to follow manner. Thank you Chayanti.
Sure you can easily try it and it is for all length. Bdw thank you so much dear ?
Just one word WOOOOOOOOOOOOOOOOOOOOOOOOOOOW
Thanks a ton Gurpreet ? ?
Superb Chayanti!
Bdw, which lipstick are you wearing?
Thank you so much ?? and it’s Maybelline New York Color Sensational The Loaded Bolds Lipstick in the shade Fearless Purple. You can check the full review ?