By Ankita
I had a wonderful experience at MAC ,Inorbit at my makeup lesson. The MUA Namrita was pleasant and very helpful as she illustrated each step of the makeup, listing the ingredients of some the products as she applied them and assisted me in picking out what to purchase. The store was a little understaffed when I reached and she had to attend to customers in the middle of my makeup a few times but that gave me a chance to have a better look at the products.

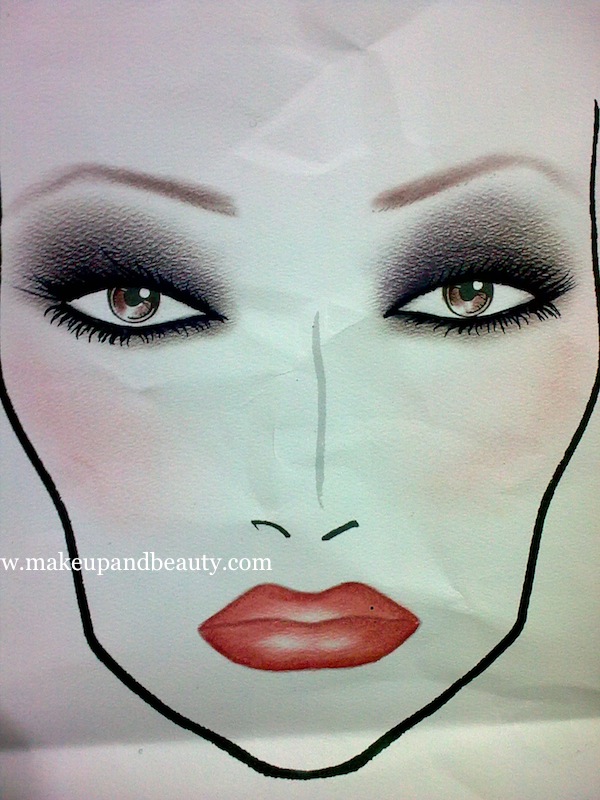
We began by discussing what look I wanted to do . I requested a smokey eye look in dark red and she suggested that I try purple or green as red would look a little OTT in the daytime since I intended to keep the makeup for the rest of the day. I decided to go with purple. She next inquired about my current skin routine, my skin type and what foundation/concealer I was currently using, my makeup procedure etc. She brought some eyeshadows for me to choose from and I have listed their names in a later section of this post. She gave me pointers and lots of tips as she applied the makeup and did my entire look on a face chart at the end of my makeup to take with me.
The makeup process is as follows:

- Step 1- Moisturizing and Priming
Products used :
- MAC makeup removing wipes
- MAC Studio moisturizer
- MAC fast response under eye cream
- MAC oil control lotion
- MAC Prep+Prime skin base visage
- MAC #190 brush
1- After cleansing my face with MAC makeup removing wipes, Namrita applied MAC Studio moisturizer over my entire face followed by MAC fast response under eye cream on my under eye area both using #190 brush.
2- Since I have oily skin, she next applied MAC oil control lotion on my T-zone to keep the oil at bay.
3- As a last step before she began my makeup , she used MAC Prep+Prime skin base visage all over face including eyelids using 190 brush again.
Step 2- EYE MAKEUP
After moisturizing and priming my face, Namrita did my eye makeup first instead of foundation so that any fallout from the eye makeup does not spoil my base makeup.
- MAC Loose powder NC30
- MAC Smolder
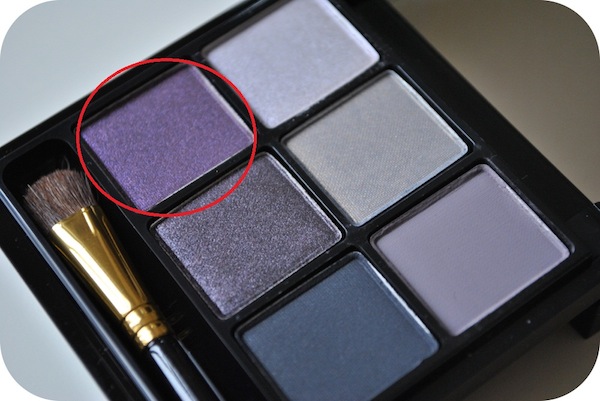
- MAC eyeshadow –‘Altered state’ –veluxe pearl finish purple shade from Tartan Tale limited collection eyeshadow palette ‘Play it Cool’
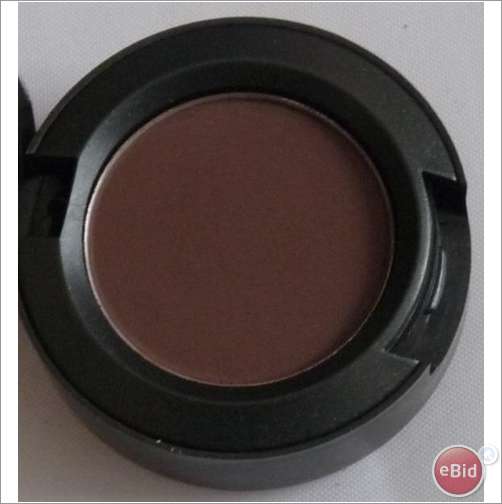
- MAC eyeshadow – ‘Handwritten’ – matte brown from permanent collection
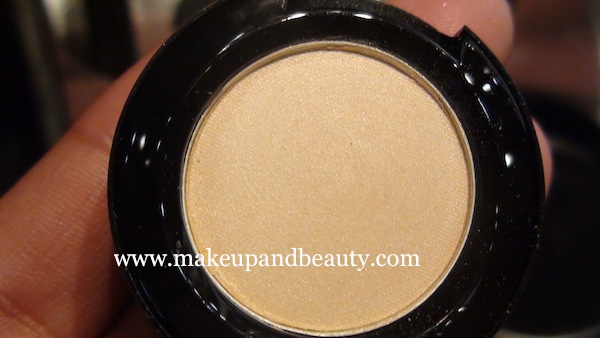
- MAC eyeshadow – ‘Sweet Joy’ – frosted pale gold from Venomous Villains collection
- MAC Technakohl pencil in Black
- MAC ‘Haute and Naughty’ Lash Mascara
- MAC Brushes #239, #224, #219
1- She started by dusting some loose powder in NC 30 all over my lids which had already been primed with MAC Prep+Prime.
2- Next she applied a thick line using MAC smolder on my upper lash line and smudged it all over my lid keeping the darkest black close to the lash line using a #219 brush. She suggested that I include this step every time I am doing a smokey eye as this will act as base for whatever color I choose to apply over this(purple in this case) and at the same time give the darkest black closest to the lash line eliminating the need to use eye liner later on which in my opinion takes away the smokey blended effect of the smokey eye.
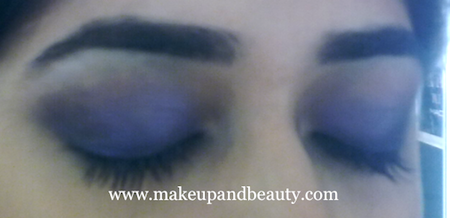
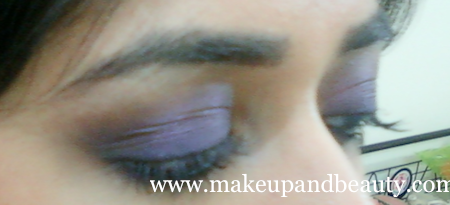
3- After giving a base using smolder, she patted the purple color from the Tartan Tale ‘Play it Cool’ eye palette all over my lid using #239 brush. She had given me the option of either this purple or ‘Vile Violet’- a matte purple from the Venomous Villains collection and I chose this one because of its veluxe pearl finish. The color came out a beautiful vibrant purple with its purple/magenta pearl because of the black base of smolder. She blended the purple into my crease using #224 brush.
4- Next she applied ‘handwritten’ in my crease which is a matte brown eyeshadow and blended it using #224 again.
5- The highlighter came next. She used ‘Sweet Joy’ which is a frosted pale gold from the Venomous villains collection.
6- She blended the highlighter and the crease color and patted a little more purple on the lid.
7- Next she used MAC technakohl pencil in black generously on my lower water line and halfway on my upper waterline and using 219 brush smudged the kohl on to my lower lash line. Next, using the same brush she applied a little of the crease color (handwritten) and some purple on my lower lash line to blend with the kohl.
8- She completed the eye makeup using ‘Haute and Naughty’ mascara which is a limited edition mascara and it accentuated and lengthened my eyelashes beautifully. It is a new launch and has 2 openings (though the wand is the same). The slimmer opening pulls out the wand with less product to give a defined look for the daytime and the wider opening pulls out more product on the wand for a more dramatic look for the evening.
Step 3- BASE MAKEUP
Products used :
- MAC Studio Fix liquid foundation NC 40
- MAC Loose powder NC30
- MAC Studio fix powder N9
- MAC Sheertone Shimmer blush ‘Peachykeen’
- MAC ‘Golden Bronze’ Loose powder
1- Having done with eye makeup, Namrita did my face base makeup next. She used MAC Studio Fix liquid foundation in NC 40 all over my face including under eye area using 188 brush. She did not apply concealer as studio fix gives enough coverage to cover my dark circles and I wanted to see if I would really need a concealer after using Studio fix.
2- Next she used the same loose powder in NC30 she had applied on my eyelids earlier over my entire face.
3- She then worked on my cheeks with studio fix powder in N9, blush and bronzer. I wanted to learn how to sculpt and contour the face to enhance the cheekbones. To illustrate this she used the studio fix powder in n9 which is a medium/dark brown shade under my cheekbones and blended it with a #168 brush.
4- After this she applied MAC ‘Peachykeen’ blush on the apples of my cheeks and topped it off with a little bronzer (‘Golden Bronze’ loose powder) on my cheekbones.
Step 4- LIPS
Products used:
- MAC Lip Liner ‘Soar’
- MAC Amplified crème lipstick ‘Cosmo’
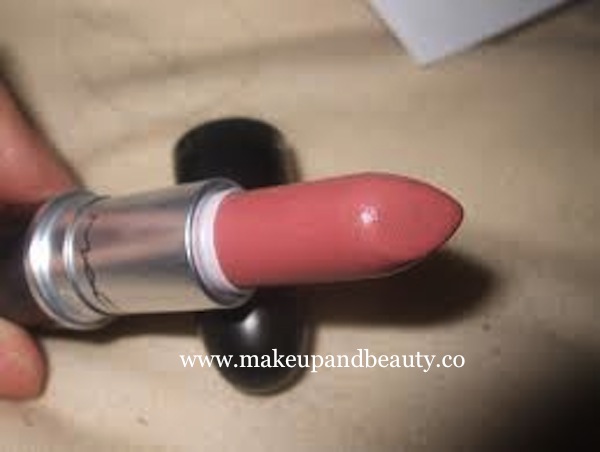
- MAC Cremesheen glass ‘Deelight’
1- Eyes and base makeup completed , Namrita next did my lips in a muted pink to go with the purple smokey eyes. She lined and filled in my lips using lip pencil in ‘Soar’.
2- Next she applied MAC amplified crème lipstick in ‘Cosmo’ using a lip brush and topped it off with MAC Cremesheen glass ‘Deelight’ which is a very creamy muted pinkish plum shade.
As a last step she used some fix+ spray on my face to settle the makeup.
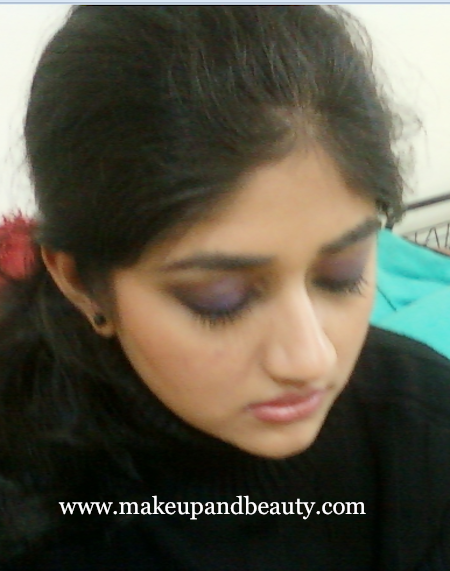
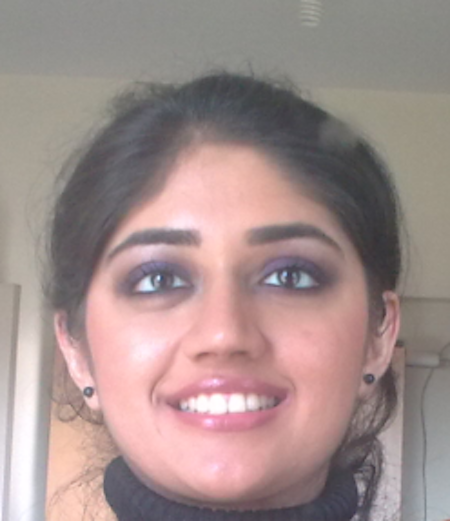
I was really happy with my entire look especially the purple smokey eyes. I loved the blush and lipstick Namrita chose to coordinate with the eyes. I had never tried the smokey smudged look to my lower lash line but I was delighted to see how it gave more definition to my eyes and would definitely start doing that from now.
PURCHASES:
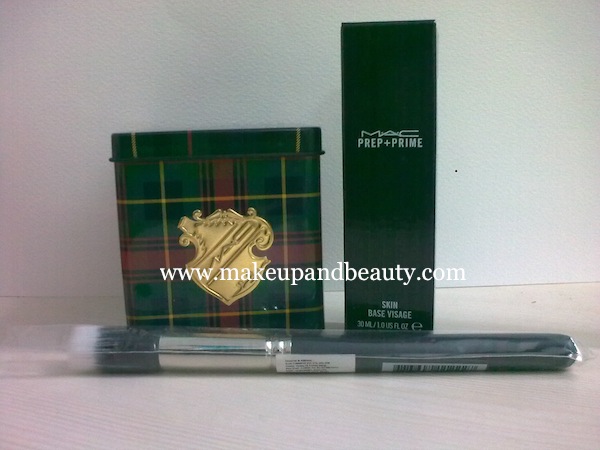
- MAC Prep+Prime Skin Base Visage
- MAC #188 duo fibre brush
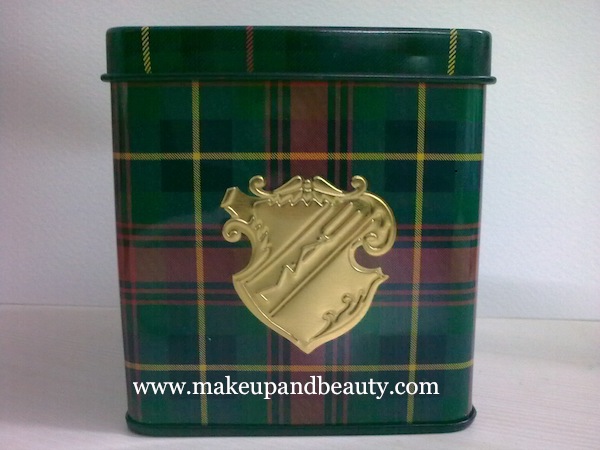
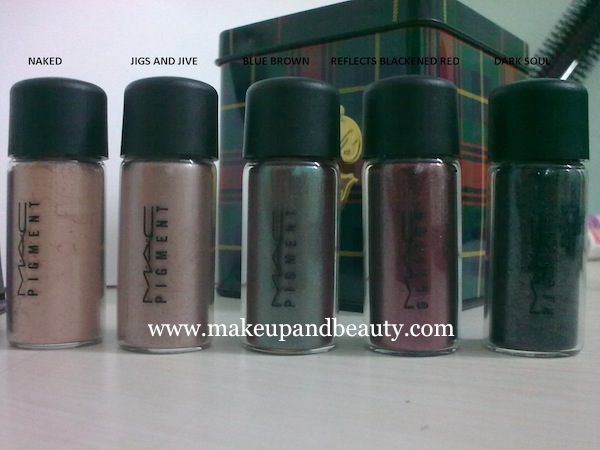
- Tartan Tale pigment set of 5 pigments-‘ Smokey Thrillseekers’
I was completely dazzled by the collection of eyeshadows that were on display and was having a hard time deciding what to pick up. That is when Namrita showed me the Tartan Tale pigment set of 5 called ‘Smokey Thrillseekers’
Price: Rs 2400
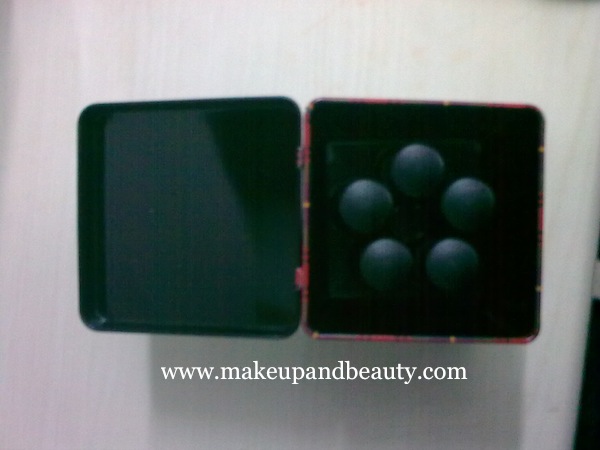
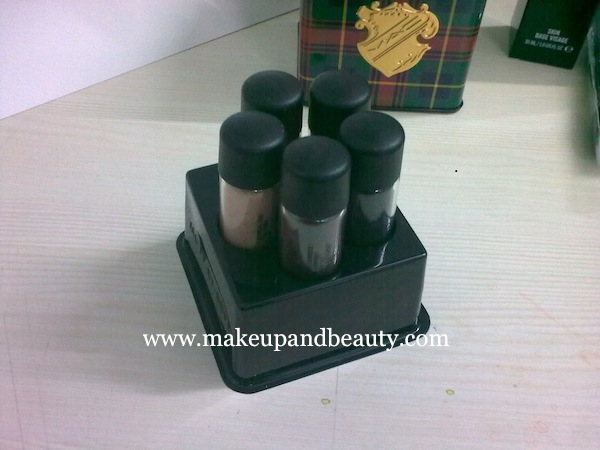
Contents: 5 pigments (each in a 2.5 gm container) housed in a tin box
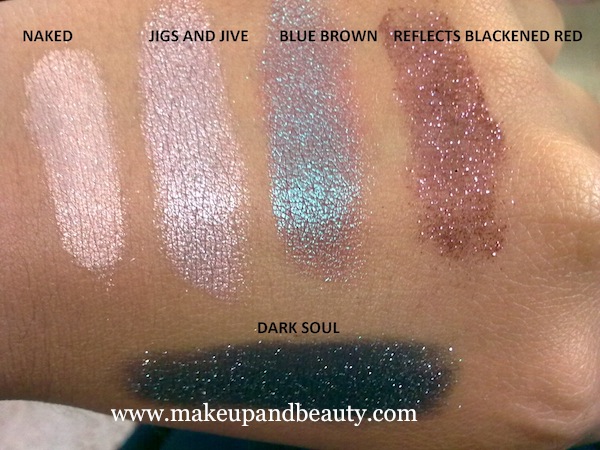
- ‘Naked’ (soft peach beige with slight gold sheen)
- ‘Jigs and Jive’ (softened tan brown with a champagne sheen)
- ‘Reflects Blackened Red’ ( cranberry red-burgundy base with flecks of burgundy glitter)
- ‘Blue Brown’ (medium-dark brown with a duo chrome teal reflective base-very interesting shade! )
- ‘Dark Soul’ (charcoal gray with silver sheen and flecks of glitter).
Overall I had a great time at MAC with the lesson, the haul and lastly the beautiful MAC store.
Hope you enjoyed!
Ankita




Ankita……. :jaiho: :jaiho: ……that MAC MUA did a wonderful work on you….nothing OTT…….and the pigments you bought…..wow…..just yesterday, we were talking about pigments……and you have given such a detailed breakdown of your makeup ……….. :clap: :clap: :clap: :clap:
Thanks Jomol! Ya she did a wonderful job.
and your forehead……just like my lovely sister’s :))
Oh wowwwwww…you had such a nice experience at MAC..and your makeup is fab. I wish something like this turns up at Bangalore too!
Thanks Radhika!
You are very pretty Ankita..
I love your makeup and the detailed DIY instructions.. It’s gr8 you got the 188… It’s on the wishlist of EVERYBODY!!!!!!
Enjoy your haul…
Thanks a lot Mrunmayee! The MUA suggested 188..said the 187 is for professionals(and more expensive).
Gorgeous makeup…..a before pic to compae would have been wonderful….u look v pretty
Thank you Sarita. Sorry I could not take the before pictures but its a nice idea.
Hey Mrun….hey Rads :whistle: :whistle: :whistle: :whistle:
Awesomeeeeeeeeeee write up Ankita..and so detailed..I could visualize each and every step so clearly…Fabulous tutorial!!! :worship: :worship: :worship: :worship: :worship: :worship: :worship: …your makeup turned out sooo stunning and glam!!! :woot: :woot: :woot: :woot: :woot: :woot: …and me louuuuuuuuuuuing your purchases sooo much…especially the tartan tale kit!! :toothygrin: :toothygrin: :toothygrin: :toothygrin: :toothygrin: :toothygrin: :toothygrin: :toothygrin: :toothygrin:
Thanks a lot Calicoaster! I’m glad you enjoyed reading. The Tartan Tale kit is such a steal- 5 pigments in one.
The makeup is very well done. Glad you had such an experience. 🙂
Cosmo is my fav lipstick :yahoo: :yahoo: :yahoo: :yahoo:
Thanks! Ya I really liked Cosmo too though I wonder how different it is from ‘Rosy Nude’ from Revlon Colorburst Range. Thats the only pink I have in my collection right now.
i enjoyed this article and how!!!! loved reading sucha a detailed description…!!
i love that lippy!!! the makeup realy looks good on u…!!
and i lobe love love the pigments u bought…
im drooling over the blue brown shade !!! :yelo: :yelo: :yelo: :yelo: :yelo:
Thanks Neha! The blue brown shade is my fav from the kit though I haven’t tried it out yet. I think MAC has some more duo-chrome pigments like this one.
Ankita, sorry. :(( By mistake I posted your article under my name . :(( have put it under Guest Posts now. :))
No problem Rati. Thanks a lot for posting this.
:-* :-* :-* :-* :-*
Wow!!! :jaiho: :jaiho:
Thank you Sonam!
Thank you Prachi!
wow ….u look so pretty……..& u picked up such great products. 🙂
Thanks Monika !
:yes: :yes: :yes: :jaiho: :jaiho: :jaiho:
u look very pretty ankita…. and the whole look is so coordinated…. i like it…
BTW …. the brush u bought….. that is wat a stippeling brush is naa???
how much did it cost??
Thank you Tommy. Ya 188 is a stippling brush though the MUA was swirling and swiping the foundation with it. Some people also like using it for blush/bronzer also though I haven’t tried that yet. It cost me Rs 2170.
Loved the way the MUA has complimented the eye makeup with subtle yet lovely lip shade….you are looking so pretty….. :yes: :yes: :yes:
Thank you Priya 🙂
Ankita.. U r too pretty..n i luvd ur lippie th most.. 🙂 🙂
Thanks Samin. Ya cosmo is a very pretty shade and it looked nice topped with the gloss though the gloss was gone when I took the pictures(I’d already had a meal by then)
u look fab ankita..dat was awesum…!!!
n blackened red, blue brown ,dark soul are :inlove: :inlove: :inlove:
Thanks Bhumika. These 3 shades would do great smokey eyes. The blackened red hasn’t showed up pigmented enough in these pictures but it is.
Lovely make up. Looking so pretty 🙂 I am loving the blue brown pigment 🙂
Thank you Aarthi! Blue brown is awesome. There’s actually a green brown also from MAC with similar duo chrome shimmer in green with brown base. Wish that was included in the collection too.
wow!!! the word is WOW!!!! The MUA did a flawless look for you!!! you looookkk ssooooooo pretty 😀 Lovely!!!!!
And your haul is soooo drool worthy!!!!! :star: :star: :star: :star: :star:
Thanks Suma!
p.s- I have the same colorbar pink bag 🙂
luvly article ankita.. just WOW makeup :victory: :victory: .. n the way u explained each n every step is reallly gud.. hoping to c more of ur articles.. 😉 😉
Thanks Nids!
“OH MY GOD” is just what i can say. Amazing post. U look quite pretty in those purple smokey eyes. The lip color is also awesome. :))
Thanks Veda!
Awesome haul Ankita- and ur make-up. muahhhh
worth every penny spent 😀
loved the look.
Thanks Bee 🙂
oh you look so so pretty!!!
Thank you Anks 🙂
Thanks Scooby-doo!
thnk u sooo much ankita for snding me the link.. :rose: neway ur most welcum to the store anytym so dat v can also try sum other luk on u… :yahoo: :yahoo:
Thanks Namrita! 🙂
hey ankita…just read this post now…wish i had read it prior to going to palladium..
the mua there was the only person when i went at noon..she did not even cleanse my face ..leave alone primer and moisturiser…….:((((
will got to mald the next time for sure..:(