DIY Eclectic Necklace Tutorial
Long statement necklaces with lots of charms and watch faces are definitely in this season, but you can make your own using old jewelry you probably have around the house. For some ideas, I looked at the necklaces for sale at Modcloth, Urban Outfitters, and Anthropologie. But instead of dishing out anywhere from $25 to $200 for one of these necklaces, I scavenged my house for loose trinkets and pendants to make my own shabby chic necklace!

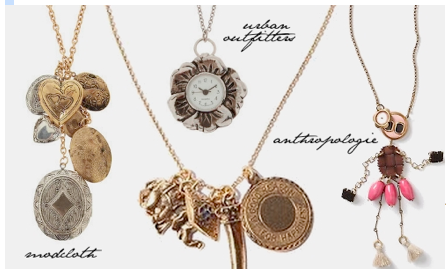
You’ll need:
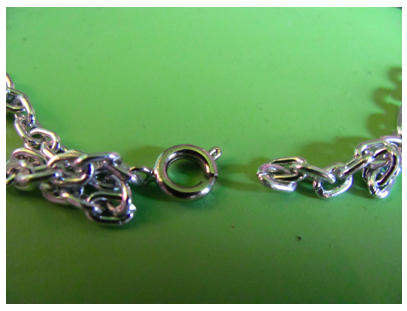
- About 18 to 20 inches of chain, in your choice of metal
- A clasp
- Various beads, charms, pendants, etc. I used a watch face from a watch that no longer works.
- Jump rings in lots of sizes
- Pliers
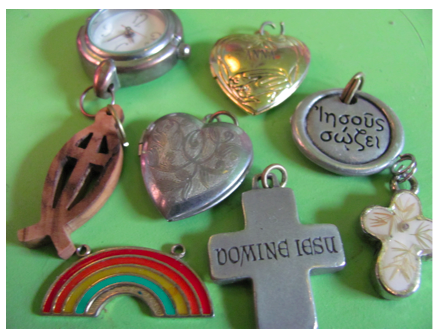
First, pick out what elements you would like to include in your necklace. I got out a bunch of pendants from jewelry I no longer wear, and laid them side by side. You can include lockets, small trinkets that have sentimental value, orphan buttons, coins, or anything really- the sky’s the limit! I chose only to include silver and natural pieces, because I felt that the gold color might distract from the overall feel of my necklace.
In the end, I picked out a silver plated heart locket, a tiny heart charm, two crosses, a wooden fish, and a watch face. I think the more creative you get when picking out the elements for your necklace, the more personalized and unique your necklace will become.

Next, cut a piece of chain to be about 18 inches long. Using jump rings, attach your clasp to both ends. Find the middle of your chain, which is where your charms will hang down from. Attach a large jump ring to the center of your chain. I used a double ring finding so that I had more places to hang my pieces from.
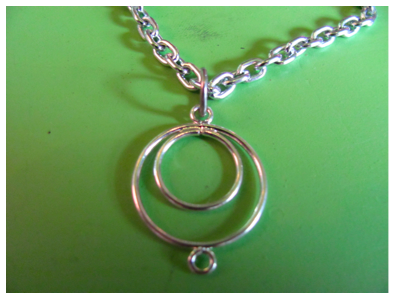
Now, lay the elements of your necklace out the way you want them to hang. Figure out which charms should be the lowest and highest, and which should go in front or behind each other. Here comes the fun part! Starting from the bottom, begin attaching the charms together or to your jump ring base.
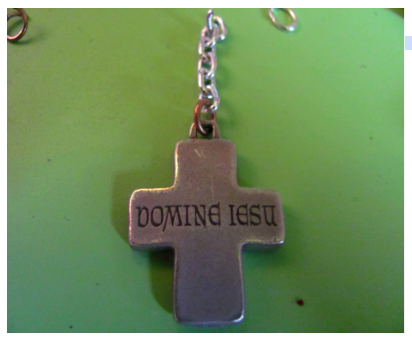
If you’re new to making jewelry, here’s a great article for how to open jump rings. To close them, simply reverse the instructions. Basically, you want to grasp one side of the jump ring with pliers, and the other side with your thumb and forefinger. Twist one hand back and the other forward to open the ring. This way, the jump ring’s shape is not distorted when you open it, which will happen if you simply pull the ring open. To close it, grip the ring in the same fashion, but bring the opposite hands forward and backwards. Jump rings are used in almost all jewelry, so it is definitely worth it to learn the proper way to work with them. You may also need to add a short piece of chain to your charm so that it hangs at the right length. In the case below, I’ve added about an inch of chain to the top of the cross charm, in order that it is far enough down.
Here’s a picture of my necklace when it’s about half way finished:
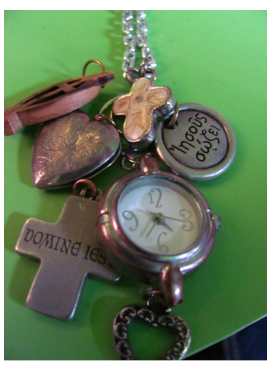
Notice how I have added jump rings here and there so that the charms are laying in the right direction. For example, instead of just attaching the heart charm at the bottom of the watch, I added an extra little jump ring so that the heart charm lays flat with the watch and with the rest of the necklace. You should try on your necklace periodically as you are adding charms, to make sure that everything is the right length and the right direction. Also, be careful when you’re working with the jump rings that they are completely closed, so that your necklace does not fall apart when you are wearing it.
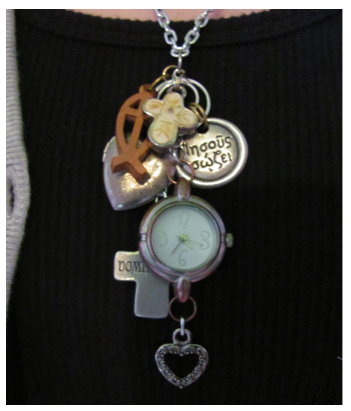
And the finished product! I am pretty happy with my necklace, but will probably add more charms onto it as I discover them. So there you have your very own chic charm necklace, completely DIY, and as unique as its creator!
This article was written by Anna Moyer, seventeen-year-old lover of vintage fashion and self proclaimed nerd. She’d be tickled pink if you check out her blog, Shy Shirley, or browse her graphic design and jewelry work in her Etsy Shop.





WoOoOoW!!! thats all i can say right now!! i am maaaaaaaajoor lover for chunky jewellery..i am always looking out at shops for big ,cute and chunky statement necklaces and now i know how i can make a real unique statement that is truly ME!
.-= fathima´s last blog ..Makeup Neccesities for a teenager =-.
Thanks so much! Statement necklaces are great- and I hope yours turns out well, if you choose to make one!! :-))
Loved the pieces you picked out for the necklace…nice article 🙂
wow such a creative idea. not a big fan of chunky necklaces. i think i will try doing this on a bracelet. btw, i had a look at your blog.i am left awestruck on how creative you are for your age 😯
I’d love to see your bracelet, if you make one- if you send me a picture to my blog, I’ll post your version on my blog! I’ve seen some bracelets like this with pendants the whole way around, and they are tons of fun.
Anna,
Welcome to IMBB. 🙂 Honestly I never thought necklace could be made at home. I keep throwing away tons of my old accessories. Guess I must bring them to some good new.
Fabulous job! :yes:
Thanks so much for inviting me to do a post in the first place! I had lots of fun making this tutorial, so let me know if you ever want another jewelry article, and I’d be happy to do it. 🙂
hey I do this all the time… but here we’d have to wear gold (my mom insists)..
so for college I wear one gold chain with gold pendants ( mostly shaped like a fish, panda, tiger etc..) I liked ur idea of wearing all of them at same time.. next time ~~ simple Tee with multiple pendants ~~~~
checked out ur blog you are talented :dazed: :dazed: :dazed: :dazed: :dazed: :dazed: :dazed:
Here for a long time most jewelry was silver, but it’s going back to gold- I was in NYC a few weeks ago, and most of the jewelry there was gold! So you’re “à la mode” here. 🙂 And your animals pendants sound very cute. 🙂
Gold is BIG SuGe!!! you’re lucky to have those animal pendants SERIOUSLY!!! :O :O 😀
I’m just in love with what you have done.. Fantastic :yes: :yes: :yes:
:-)) :-)) :-)) :yes: :yes: :yes: :yes: love all the pieces….I always wondered where I could get such cute pieces…..now I can make on my own! 🙂
Wow, I LOVE IT!!!! I really like those charm necklaces, but they tend to be quite expensive… I did do one of my own a few months back and I’m adoring it, like every other DIY stuff! yay 4 creativity! :yes:
xoxo
.-= Alexandra Z.´s last blog ..• The swatches promissed Special-Ks contest prizes! Yay! – • =-.
wow i totally loved Anna Moyer’s blog!!! :yahoo: :yahoo: :yahoo: :yahoo: :yahoo: :yahoo: i am SO smitten :hypnotized: :hypnotized: :hypnotized: :hypnotized: :jaiho: :jaiho: :jaiho: :jaiho: :jaiho: thank youuuuu!!!! :heart: :heart: :heart: :heart: :jaiho: :jaiho:
wonderful idea….thank you for this super blog…. i also making jwellery in home. your ideas are really awsm.