Hello IMBB beauties, hope you all are doing well. Love is in the air and truly you can feel it out here too. Everyone seems to be so exciting. I am super-excited too. But jealous of all those who could meet their respective partners and have fun. I so hate long distance relationship. 🙁

Anyways, first of all wishing everyone Happy Valentine’s day. :-* :-*
Hope you all have a great lovey-dovey day. :yahoo:
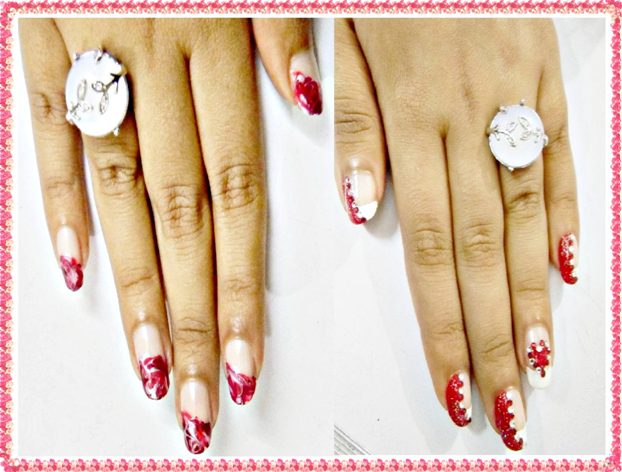
I am here today to show you two nail art photo tutorial which are super-duper easy. Trust me I have made it really simple.

This is what I will be working on today.
I hope you like it. Please be free to comment.
So let’s get going
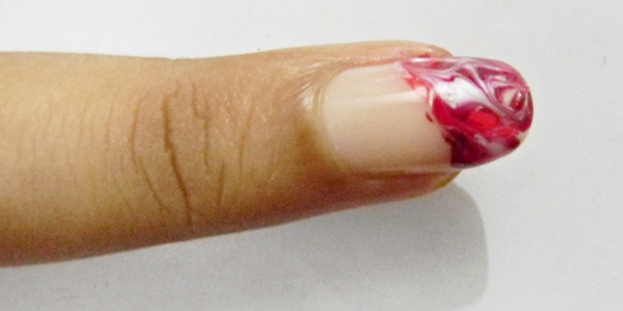
Tutorial 1: Triple color marbling design
This design is very quick and easy. You don’t need many tools. And you can take color of your choice or matching your outfit. This colors are solely chosen based on Valentine theme.
Things you need:
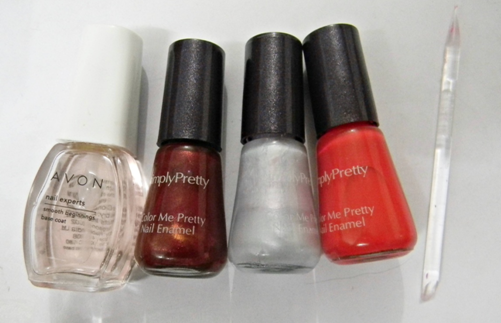
• A transparent base coat and top coat
• A matte color bright nail paint ( I am using Avon Simply pretty Fire Cracker)
• A shimmery dark color nail paint (this should be darker and shimmery than your above chosen color….I am using Avon simply pretty Luscious cherry)
• A shimmery pearl color as contrast color ( I am using Avon Simply pretty Ballerina pink)
• A toothpick or an orange stick.
Step 1:
File and shape your nails. Moisturize the cuticles.
Now apply a clear base coat. Do not allow this to dry. Immediately follow the remaining steps. Please do not forget this.
Step 2:
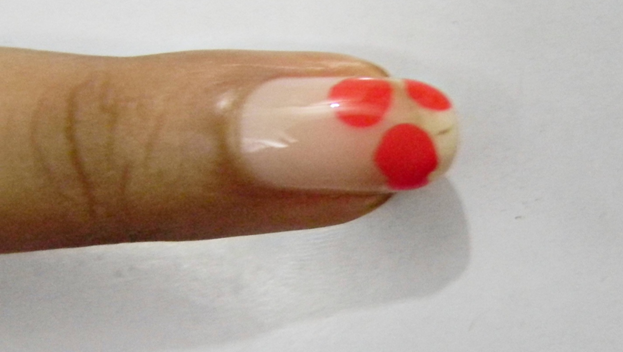
Make random dots on still wet base coat. You can do this on your entire nails or just at the bottom like I have done.
Step 3:
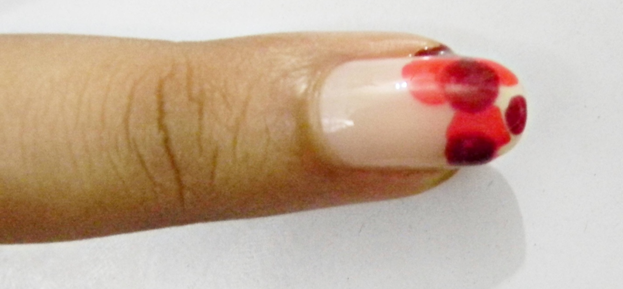
Do the same as step 2 with other nail color. But choose empty spots this time.
Step 4:
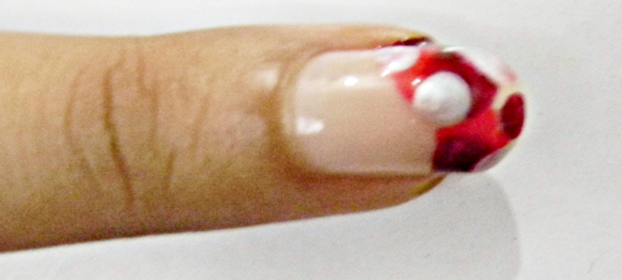
Again choose the lightes color at the end and make random dots on the other two colors.
Step 5:
Now take an orange stick or a toothpick and with light hands make swirls. This is real fun…trust me. :jiggy2:
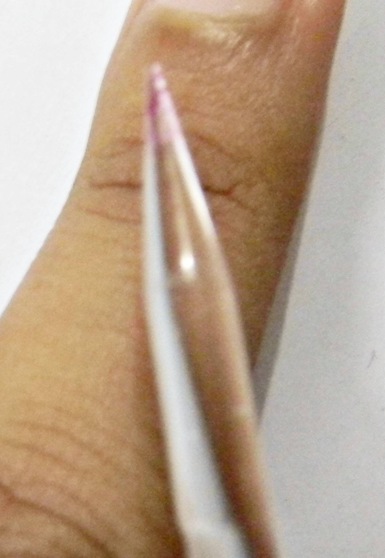
Lastly apply a top coat and let it dry completely. Isn’t it quick and easy?
And so much fun to do. 😀
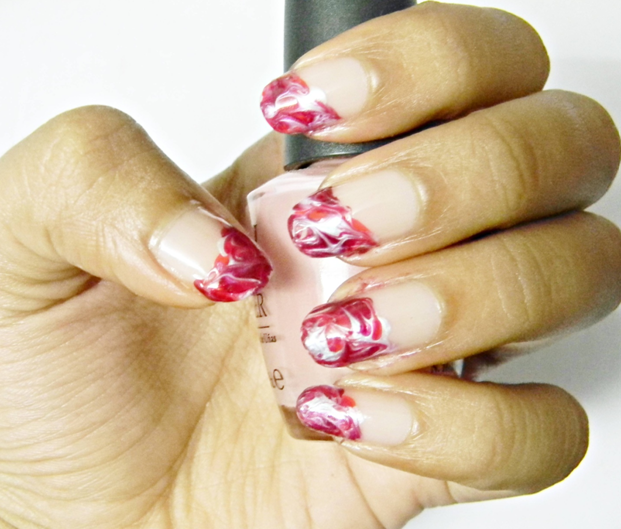
Hope you liked it.
Let move on to the next.
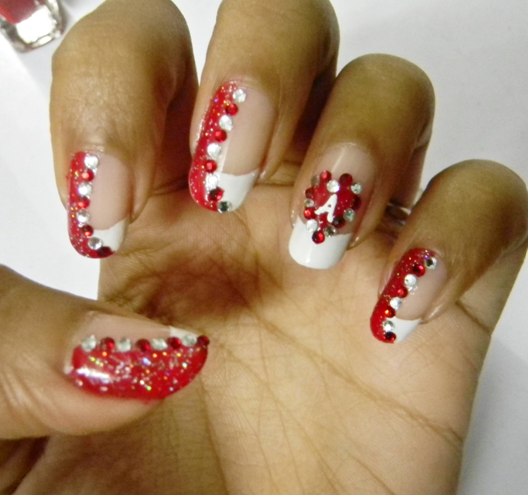
Tutorial 2: Red and white Nail Art with pretty Rhinestones
This is what we will work on.
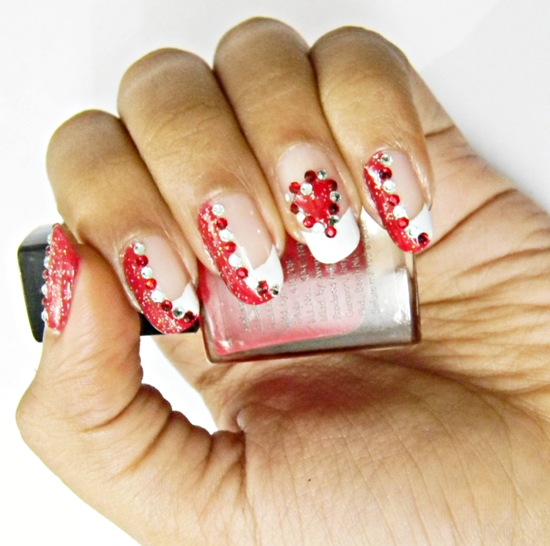
Liked it? Then follow the steps to get it on your hands too!! :))
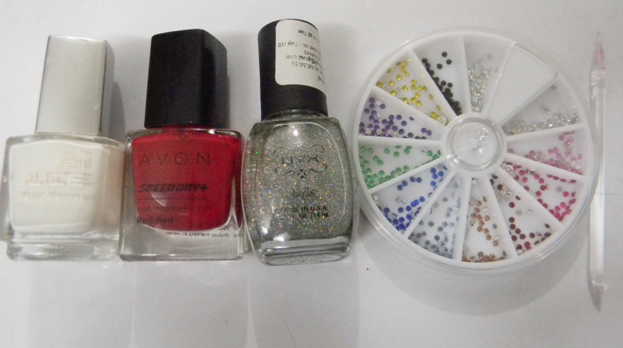
Things you need:
• A transparent base coat/ top coat
• A white matte nail paint (I am using some non brand one)
• A bright red nail paint ( Avon speed dry Red Red)
• Any silver sparkle nail paint (I am using NYX)
• Red and silver rhinestones
• A toothpick/orange stick (to pick up rhinestones)
Let’s begin.
Step1:
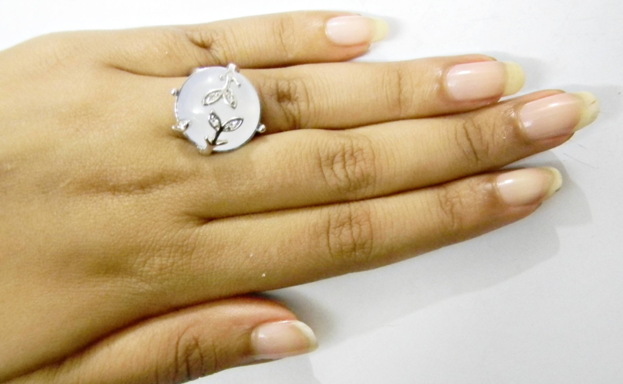
Apply transparent base coat.
Step 2:
Do your French manicure. Make sure you do it nicely. 🙂
Step 3:
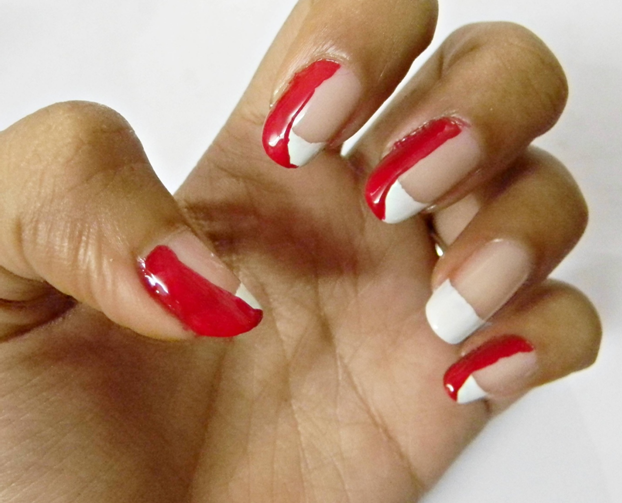
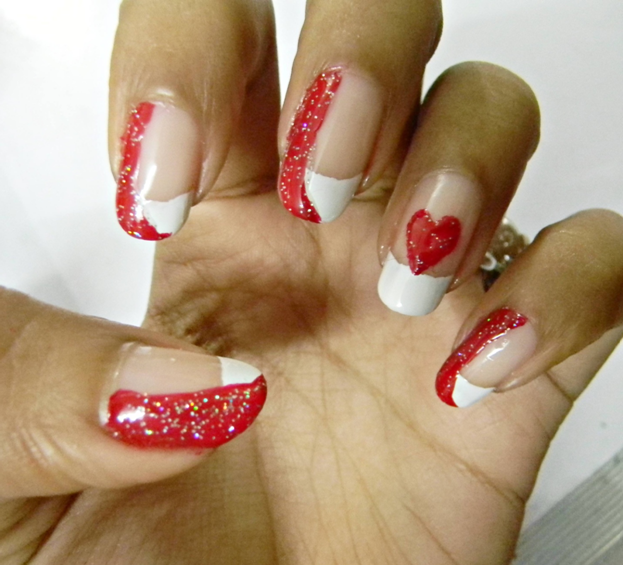
As seen in the photo below….color one half with bright red. ( you can again make choice of you color)
I have left the ring finger for the heart. 🙂
Step 4:
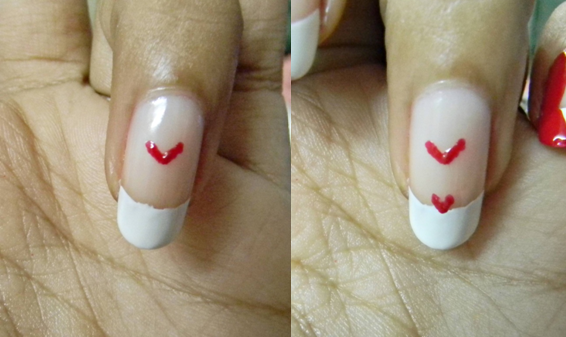
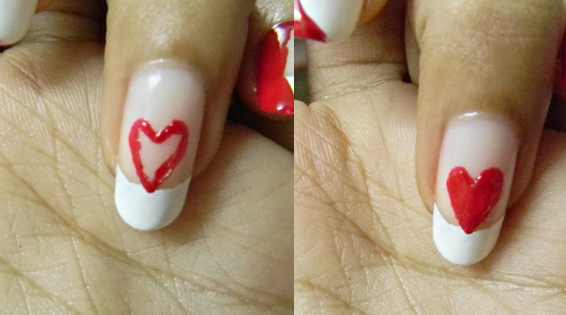
Below are easy step-wise images to make that perfect heart on your ring finger nail. :yahoo:
Step 5:
Take the glitter nail paint and apply it over the red colored part and the heart.
Step 6:
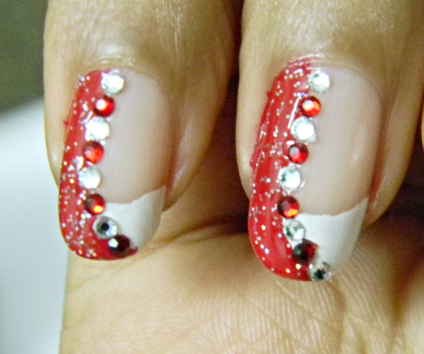
Now apply transparent base coat on the middle of the nail. Pick up rhinestones with tip of the toothpick and place silver-red alternating ones as shown in photo. (apply base coat on the tip so its easy to pick up the rhinestone)
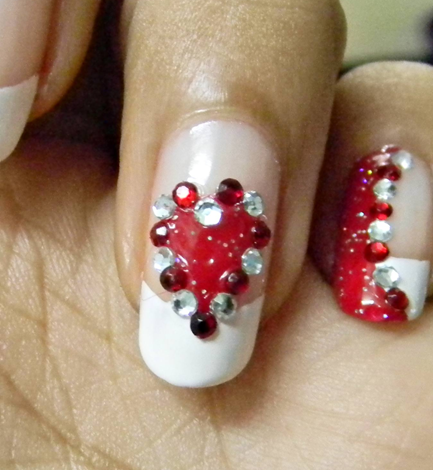
And same alternating rhinestones around the heart. :))
Step 7:
Apply top coat to seal the rhinestone.
And you are done.
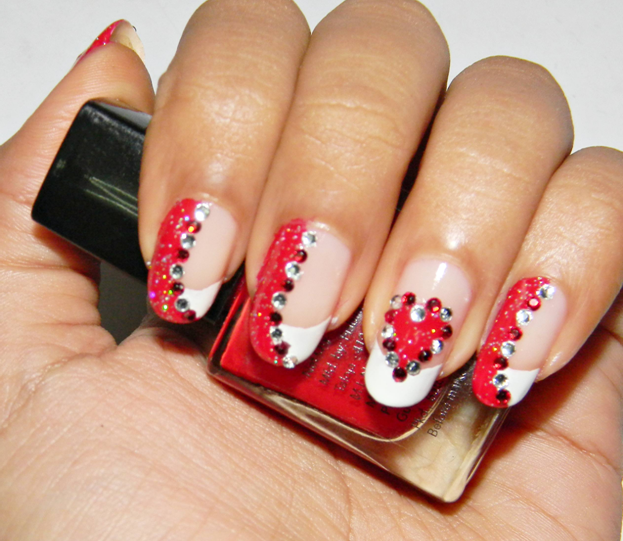
(with flash)
This is something special. I dedicate this to my love! :heart:
So I just went one step ahead and wrote his initial in the heart. :)) I hope he likes this too.
A short message for him: “Distance never separates two hearts that really care, for our memories span the miles and in seconds we are there. But whenever I start feeling sad, because I miss you, I remind myself how lucky I am to have someone so special to miss. I will try to get things out of mess. I will try to put everything just as it has to be. I promise to be the way you like me to be- myself. In return I just want one thing, your love- forever. Happy Valentine’s Day jaan! Love you!”

Happy Valentine’s Day to the whole IMBB gang. :heart: :cheers: :rose:
Loads of Love,
Jinal.


Wow! Jinal!!! Loved the first tute the most and I soooooooooooo looovvveeee ur ring 🙂
thank you Suma…. do try it out….its super easy and quick! :))
me too love the ring :yahoo: :thanks: :thanks:
very quick n easy!!!!!!!!!!! v nice!!
happy valentine day to alll :rose: :rose: :rose:
thank you Princa :thanks: :thanks:
Wish you the same :rose: :rose: :rose: :rose: :thanks: :thanks: :thanks:
:yahoo: :yahoo: :yahoo: :yahoo: :yahoo: :yahoo: Sooo beautiffulllllllllllllllllll!!! :jaiho: :jaiho: :jaiho: :jaiho: :jaiho: :jaiho: :jaiho: :jaiho: :jaiho:
thank you Cali :yahoo: :yahoo: :yahoo:
Do try it…. :-*
thank you Scarlett…wish you the same!!
My V-Day will be over the phone…as he is in Delhi and am in Mumbai :((
So no celebrations.
Do send me pics when you try this design! :-*
hehe….yes long phone bills for sure :woot: :woot:
Awesum.. luvly.. superb.. cute… sweet… brilliant :victory: :victory: :star: :star: :jaiho: :jaiho: :jaiho: :clap: :clap: :clap: .. Jinal, happy valentines day :yahoo: :yahoo: .. both tuts r guuudddd.. i’m going to try out the first one now.. thankiiissss.. :))
same to you….. surely try out 😀
Jinal on a serious note, have you ever given a thought on becoming a nail art artist?
Rati…..I just take this as creative challenge. And when I came to IMBB I thought of sharing it with girls here.
Now I really feel like I should refine and do something about this :))
I wish I could start a blog on Nail Art. :((
Thanx Scarlett….. you guys are just amazing….put so much enthusiasm to try new stuffs :thanks: :thanks: :thanks: :thanks:
Jinal you stay in a place like Mumbai , where you’d get umpteen opportunities. I think you must really give this a shot. you are too good at this. :-*
hmmm…..thanx Rati….I will consider your advice :-* :-*
soooooooopppppeeeerrrr!!!! :yahoo: :yahoo: :yahoo: :yahoo: me fell in love with both!! :inlove: :inlove: :inlove: :jaiho: :jaiho: :jaiho:
awww… :weep: :weep: :weep: (khushi ke aansoo)
awwwwww……. :hugleft: :hughright: :kissblow:
:thanks: :thanks: :thanks: Sireesha
Subtle Sexy Classy……That is what it is!!!! :bravo:
Thank U sonam :thanks: :thanks: :thanks: :-*
Very pretty Jinal !! :woot :woot: :woot:
Specially loved the first one ! I am soooo gonna try it :jiggy1: :jiggy1: :jiggy1:
surely try it Ritika….its super easy :yahoo:
ole baba….pweeety…i have left a comment for u on rati’s post.. 🙂
I read it Zeeba :jiggy2:
Hi Jinal..
Nice designs..I must say u have beautiful nails..keep it up..
thank U Rupa :happydance: :happydance:
thats awesome…. really creative :waytogo: :waytogo: and the message is very cute :rose: :rose: happy valentine’s day jinal 🙂
:thanks: :thanks: :thanks: :thanks: and wish you same Ramya :kissing:
omg…this is sooooo beautiful jinal….truly valentine special…….love it… :-*
thanx Priya :-*
So pretty Jinal. And message is so nice and romantic. Loved all 3 tutes. The 1st one is so unique. Hope u hav a grt day. Last yr even I had my Valentine date on a webcam. Lol.
Btw thanks for sending me the invite 🙂 hugs
thank you Bee :thanks: :thanks: :thanks:
And you are welcome 🙂
Good stuff Jinal …Happy V-Day..
thanx Shanaiia……same to you :-*
:jaiho: :jaiho: nly u can pull such luks dear :worship:
no Veena….its very simple….it will look good on your nails too….try it :))
Beautiful Jinal…..it looks lovely….and NEAT…..you know of late, I have seen some really untidy and tacky nail arts that this is like a complete relief for my eyes :clap: :clap: :clap: :clap: :clap: :clap: :clap: :clap:
awww….thats so sweet of you Jomol….. :thanks: :thanks: :thanks:
excellent Jinal….. both of them are awesomest and wowest nail arts 🙂
and again very well explained.. :thanks: :thanks: :thanks: :jaiho: :jaiho: :jaiho:
thanx AMee :happydance: :happydance: :happydance:
Gorgeous………..you are the best nail artist Jinal :victory: :victory: :victory: :victory: :bravo:
m obliged :hugleft:
I must say that this is one of the best nail art tutorial that I have come across.. Jinal Good Job , I will try this for sure….I so love everything specially the message !! God Bless ya both.
thank you Maria :heart: :-*
This is the best nail art I’ve seen Jinal. And somehow I’ve never been keen on nail art..I like my nails in plain color but this looks amazing!! You should start a blog on nail art.
thanx Ankita…..I am so glad with all positive responses :thanks: :thanks: :thanks: :thanks:
nice jini……love this …….:* :* :* :*
OMG….you actually commented here :shout: :shout: :shout: :shout: :shout: :shout: :shout: :shout: :shout: :shout: :shout: :shout: :shout: :shout: :shout: :shout: :shout:
Thank you thank you :happydance: :happydance: :happydance: :happydance: :happydance: :happydance: :happydance:
Love the 2nd nail art and no dbt it goes to the spl one 🙂
Beautiiiiifulllll Jinal, you are a very talented girl! You are so good at make up & nail art! Keep it up! :yes: :yes: