This is my first post for M&B and I will try my best to keep the ball rolling. The concept of nail art is not so popular but sure it is a very vast and extensive field from a beautician point of view. Remember that the good looking nails equally reflect a part of your dress up. Many people have begun starting taking this as a career opportunity because it seems a profitable business to them. I think that you will soon find shops making attractive designs on your nails, like today you have tattoo making shops in the market. And I am sure that if you try this art once, you will really enjoy it and you would find yourself lost with this. According to me this art is purely based on ones imagination, and you can therefore design your nails according to what is the need of the hour. The best part of the story is that it is not so much time consuming and also no so costly.

Image Source
Different variants of Finger Nail Art Probably the simplest and best-known variant of nail art is the painting of the fingernails with nail polish. The nail is covered with a thin layer of lacquer with the desired color. There are huge amount of coating shades available in the market, so go with the color you prefer the most. I think this form of nail art is tested by most women.

Women now can also grow their nails with UV gel or acrylic. This is also a course covered in the nail art. In stores, many products such as color gel, powder glitter, rhinestones, nail art sticker, shell splinters, nail tattoos, etc. are available to perform this art. 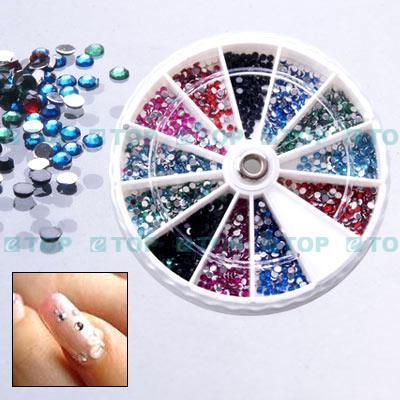 Image Source
Some of the nail art accessories are also used in modeling. For example, a Glitter powder is mixed with UV gel and this solution can be used for joining the nail. Other nail art products are placed at the end of modeling. Self-adhesive nail stickers are placed for example at the end of the nail and covered only with a clear lacquer. I recommend that you should use branded UV gel (some branded companies offering UV gel are: EDGE, SHEBA NAILS, KRYSTAL GEL) It is entirely possible to combine different nail art items at a modeling together. In particular, creative and experienced nail designers like to make their use, and let their imaginations run wild. Thus, the fingernails of the individual client seems to look unique and stand out from the masses. For processing of nail art you need only a few standard tools that you should have always at hand. Special thin Nail art brush with very fine quality of hair required, for example these are used in the processing of color gel or paint to draw clean lines and color shading. Here, the use of a so-called spot is recommended to draw swirls. For placement of Nails stickers and rhinestones you need tweezers or a nail design pusher. 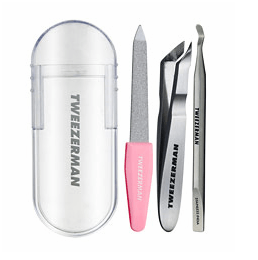 Before you start with, I will suggest that you use a good quality nail polish as this would ensure a better look of your nails. Here is a tutorial (an example of nail art). I tried this time with a bluish green-colored nail polish in combination with a purple and pink design. One hundred percent satisfied, I’m still not, but maybe this attempt says yes to one or another of you. Here is a short example to get started with: (Refer the picture given below)
 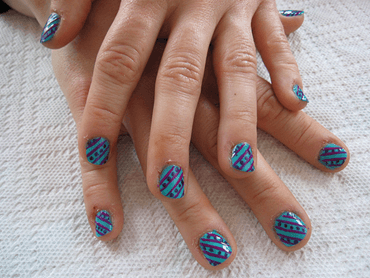 Image Source: Abby Walton’s photostream
- First of all using Nail Polish remover, remove old nail polish and make sure that the nails are properly cleaned.
- Now, apply one thin layer of base coat (it would protect the nails from staining). Leave it to dry. If you think that the base is not strong, then better add one more thin layer over it. But avoid thick layers as it takes a lot of time to dry properly.
- Next, apply the base. (According to the photo shown below it is bluish color).
- Now use purple color nail polish to make diagonal lines on the nails. (Important: make it sure that the original blue base does not intervene with this color and also see to it that the lines are not too thick. So if you have a nail brush that is not so thin, then better use toothpicks). Now leave it for sufficient time so that it could dry.
- Now take purple color nail polish and make dots in between the lines that have drawn already. (Refer picture for more clarity).
- Now comes the most important step, the top coat. Not using top coat can completely damage your hard work and the creation. Make it sure that before you apply top coat the initial nail paint is completely dried, otherwise it may intervene with other colors. I suggest that you must wait for atleast half hour before you use top coat.
Hope you enjoy the post but please do it very carefully or you have to repeat the whole procedure again. If you are unable to do such things at home, then its better you go to the professionals. Here is the address for one such shop in Delhi: SIGMA Nail Art Machine – 2/24, 3rd Floor, Jangpura A, New Delhi, Delhi, India. (They also have their branches in Chennai, Banglore, kolkata, Pune)



very pretty.. show us more… show us moreeeee
Are those Sumit’s nails? Somebody clear my confusion, pls….
wonderful post, yaar… first pic was “shot of the day” THnq very much Sumit…pleasure meeting u 🙂
Sumit is a boy. So these are not his nails. He has given the image sources. 😛
🙁 Sorry………..
You don’t have to. 😛 I had to ask him myself.
Wow Sumit, Lovely post… Feels great when men show interest in makeup and stuff.. But having one teach you such beautiful things is just amazing.. Hope to see so much more stuff from you… Great start… 😀
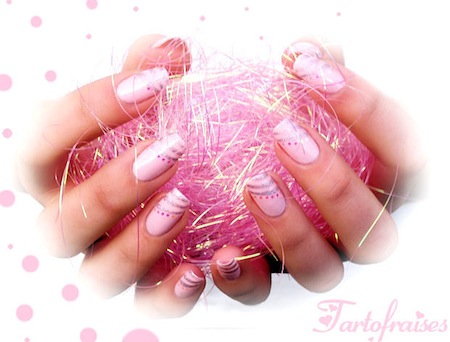
And the pink nails in first photo are to die for…… Too pretty.. 😀
Thanx gals for your precious comments, i will keep writing but you plz keep reading.
congratulations on your post sumit.
i love the pink colour in d 1st nail art … whtz d colour ?? frm whr u got it ???
I am in love with those first set of nails 😀
Nice post Sumit..
Rati, kudos to you for bringing in more men to write too. We get an entirely new perspective on the subject of makeup,nails etc through them.
Thank you, Poornima. 🙂
Omg so pretty! Nice post:)
The pink with white nails in the first pic is tooo pretty!!! Thanks for the tips Sumit
♥xx♥
Hey Cynthia, i have once tried that, and it worked so well… it looks awesome..pink n white polka dots
Ok Gravatar SUCKS! Grr…
Actually it doesn’t. You just need to clear the cookies and cache in your browser. I can see your gravatar.
Thanks for the post Sumit…lovely nails though…..
I am so going on a hunt for this pink. 😛
hey i have tried it once, i ll do it once more for u and ll send u .. :jiggy1: :jiggy1: :jiggy1:
I never know some men were so into nails :D…. Nail art looks absolutely lovely. But I will have to visit a professional for this. I can barely paint my own nails properly, forget making art. Nice post Sumit 🙂
Same here , Tanveer. But I think I am going to try the first one. It looks easy and pretty.
the Very Nice Video Nail arts L Like It
they look amazing i am starting to learn how to do them
it is amazing how you do them nails when i am older i whant to do nails like that
Gr8 sumit i m a nail art lover n thanx .fr so lovely tips *duh*