Two Nail Art Designs for Party – Tutorial
Here I am showing you girls 2 very simple nail art designs to match up your glamourous outfits and make your hands look dainty and pretty :-*.
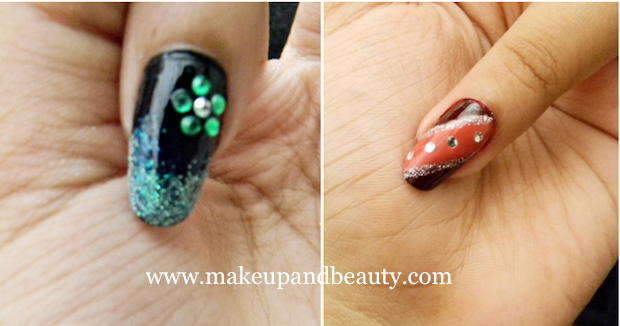
This is what we are going to work on today.

First design is classic black glitter look with green rhinestones. And the second nail art is maroon and orange side striped design with silver rhinestones.
Lets begin with the first one.
Black and green glitter nail art

Products you require:
- Base coat (Avon base coat)
- Black nail polish (Avon spped dry nail paint Warm black)
- Glitter (purple which turns green when applied a top coat :-P)
- Rhinestones (I am using green you can match with your outfit or stick to silver)
- Clear top coat. (Ambika Pillai Hard candy)
Step 1:
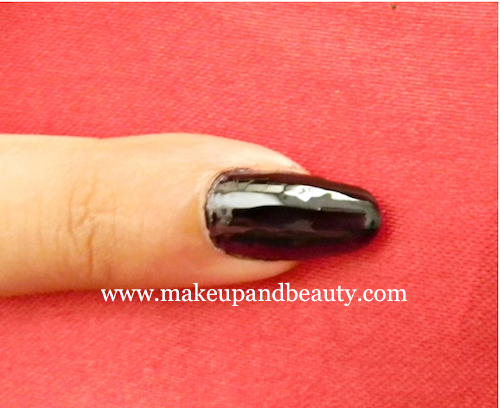
Apply base coat. Let it dry and then apply a matte black nail paint.
Step 2:
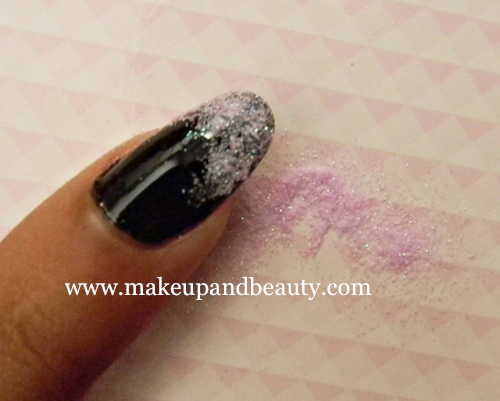
Apply a clear nail paint only on the tips of your nail. Then dust some glitter with color of your choice.
Allow it to dry for 3-4 minutes and brush off the excess lightly.
Step 3:
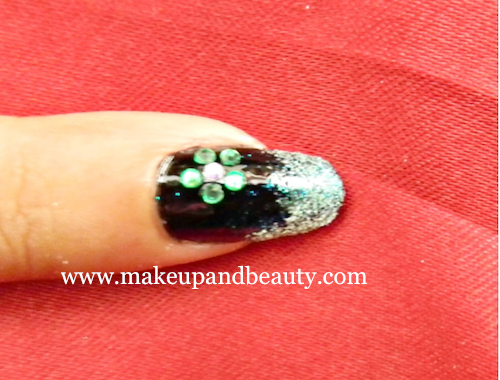
Apply clear nail polish and place rhinestones in a flower pattern.
I place a multi colored in middle and green for the petals since my glitter has turned green after applying clear paint. 😀
Step 4:
To secure the rhinetones apply another coat of clear nail paint. Let dry completely.
Voila!! And its done! Hope you liked it! So simple na!! :))
Lets begin with the second…..
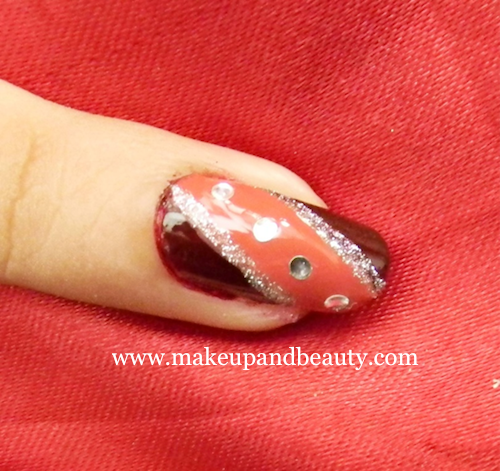
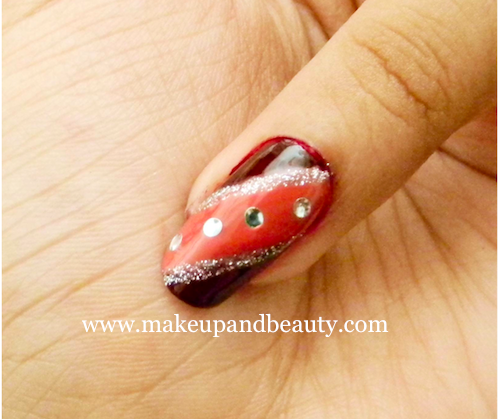
Maroon and Orange Striped with Silver rhinestones Nail Art
This is also a very simple to do nail art. Remember you can try this with any colors you want.
Things you require:
- Base coat.
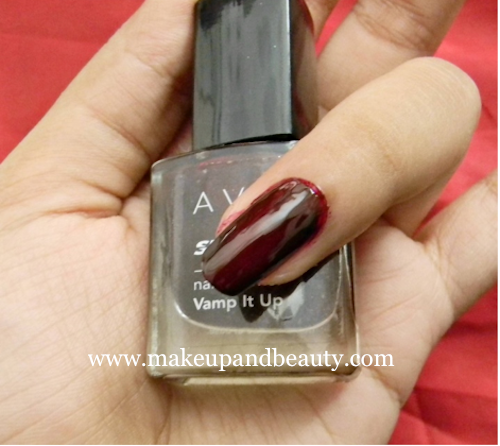
- Maroon Base color (I am using Avon Vamp it up)
- Orange nail paint color (Avon mango mania)
- Silver glitter nail art pen.
- Silver rhinestones
So lets begin….
Step 1:
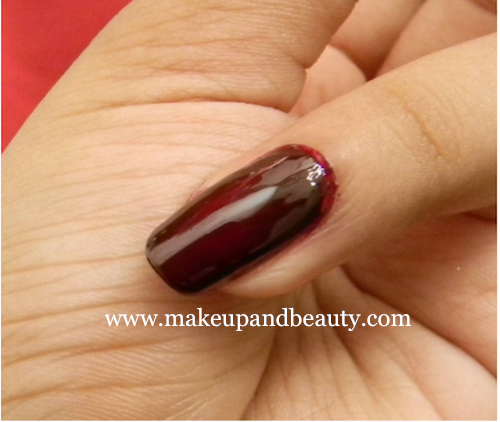
Apply base coat. Let dry. Apply two coats of nail polish of your choice. Here I am using a deep maroon color.
Step 2:
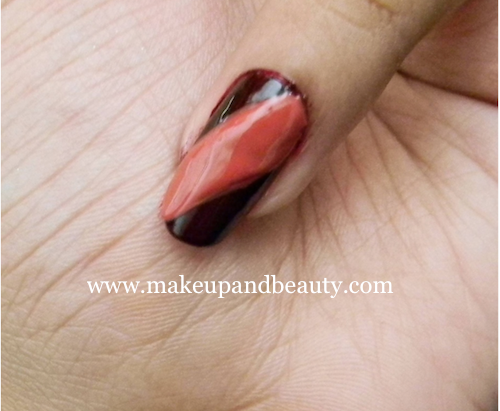
Now with the orange nail paint draw a stripe beginning from one corner of your nail going towards the opposie corner. You can control with the thickness of the stripe as much as you like. I have made a thick one as I wanted to place rhinestones in middle. :))
Step 3:
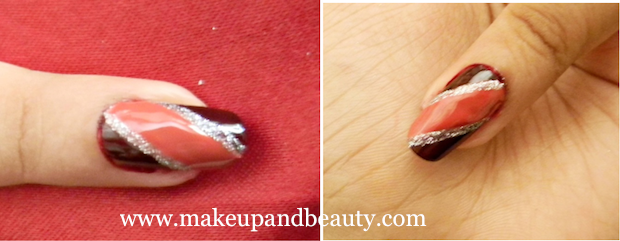
Now with a silver glitter line the borders of the orange nail paint. This will hide all the unruly lines too.
Let it dry completely.
Step 4:
Apply a clear nail polish. Place rhinestones on the orange stripe. I have placed four ‘cause of my bigger nails.
Step 5:
Apply clear nail polish to secure the rhinestones and finish the look.
Hope you all liked it. And would try it. Please do comment below what you think.
Love you all. Have awesome fun.
Say goodbye to all worries of 2010 and welcome wholeheartedly 2011!
Hope you all have a very Happy and Prosperous and ofcourse BEAUTIFUL 2011.
Happy New Year :))
Love Jinal!!!!!
Also read :






:hypnotized: :hypnotized: :hypnotized: :hypnotized: :hypnotized: :hypnotized: :hypnotized: this is sooo perfect jinal..Both the nail arts!! Awesome precision you have!! :worship: :worship: :worship: :worship: :worship: These are soooo apt for a party!!!! Lovely tutorial dear!! :bravo: :bravo: :bravo: :bravo: :clap: :clap: :clap: :clap: :-* :-* :-* :-* :-* :-* :-*
thanks a lot Cali…… :-* :-*
these glitters make it so partyish and yet very simple to do….don’t even take that much time like other nail art designs 🙂
It is absolutely gorgeous, Jinal. i have the same purply white shimmer lying with me and i didn’t know what to do with it…Now I know…Thanks… :-*
thank you Rati…..you know sometimes I also use normal stationary glitters to make this work….hehe :yahoo:
And thanx for posting this now….I was so out of touch when in Delhi…had to compromise with the Net connection….but was totally worth it :)) :hugleft:
Most welcome. :-* I really cnat wait to try the glitter thingy he he he he 😀
Jinal..its awesome and so amazingly simple..well you make it sound simple…am pretty sure I will have another story to tell when I try it…but I so want to try this…. :woot: :woot: :woot: :woot: :woot: :woot: :woot: :woot: :woot:
rads :spank: :spank: :spank: :spank: :spank: :spank: :spank: :spank: :spank: :spank: :spank: :spank: :spank: :spank: :spank: :spank: :spank: :spank: :spank: :spank: :spank: :spank: :spank: :spank: :spank: :spank: :spank: :spank: :spank: :spank: :spank: :spank: :spank: :spank: :spank: :spank: :spank: :spank: :spank: :spank: :spank: :spank: :spank: :spank: :spank: :spank:
Rads….its really simple….like copy-paste 😛
here it would be…pick and paste for the glitters and stones 😀
Do try it…I am sure it will turn out pretty pretty…and do share the pics!! :yahoo: :yahoo: :-*
Will def take pics if I get it right..:)
both r pretty….esp d black….!!!!
thanx Bhumika 😀
hey Jinal… :))
I have a wedding to be attended on saturday….sari is of same colour maroon with mustard ( sec pic) yippeeee :dance: nail matching to sareeeeeeeeeeeeee :yahoo: loooouuuuueee u :bravo:
ahhh…..thats such a co-inci…..then you should definately try it…and let me know how it turned out :-* :-* :-* :-*
woooooowwwww!!!!!!! the black one is sooooooo gaaawwwjjjuuussss!!!!!!! :woot: :woot: :woot: :woot: :woot: :inlove: :inlove: :inlove: :jaiho: :jaiho: :jaiho:
*what is that magic glitter you used? :fingersxd:
thanx Sireesha…..the glitter is Konad nail art glitter I had ordered online :))
But you can use any other glitter….I sometimes end up with stationary glitters :whistle:
Jinal! I liked the second one! You seemed to be a pro girl! :waytogo:
thank you Uzma….I am not a pro…just refining my creativeness….making it as simple as I can :))
Jinal, the maroon-orange look is FABULOUS!!! I love it. Where did you get the silver glitter nail art pen?
thank u so much….even I like the second one…. :))
I got the glitter pen from a local beauty shop in Mumbai….they have this in many colors
You can also get it online from Konad 🙂
Both the nail arts are very pretty n creative Jinal… will surely try them.. thanks a lot 🙂
:yes: :yes:
thank u Amee…..do try them and let me know how it turned up…am sure it would look pretty :))
this looks so professional types Jinal!!!!! 😐 😐 😐
I will never be able to do it so well 🙁 I loved it!!!!
awesome awesome awesome tute Jinal :waytogo: :waytogo: :waytogo: :victory: :victory:
Suma thank you….but its really simple….and I am sure you can do it :))
Do try it!!
Jinal wow !!!this is one of the best nail designs I’ve ever seen :-*
thank you Sonam….thats really sweet of you :-*
nice one jinal ! 🙂
thank you Rids :))
WOW!! they are so pretty, it looks so pro, great job 🙂
thank you Abi :))
what are rhinestones and where do we get?how much does it cost?
r.mona…..rhinestones are small diamont like stones….you can get in lots of colors….I ordered them online
You can also use small stone/shiny bindis instead….this is a cheap alternative :))
very pretty 🙂
Jinall….you are so creative…..amazing nail art especially the brown oneeeeeeeeee:)
thank you Shanaiia and Jomol :* :* :*
So pretty jinal… and so perfect 🙂
I used to think I’ll never be able to do such intricate nail-art and I hate goin to nail studios but thnks to IMBB and u now I can at least try… yipppeeeeeeeeee
:yahoo: :yahoo: :yahoo: :yahoo: :yahoo: :yahoo: :yahoo: :yahoo: :yahoo:
see thats the way girl…..I was not good at all this too….never went to any class….just watching others do and learning by trying them made a drastic change….’never give up’ is the new mantra…keep trying!!! :yes: :yes:
woow gr8 nail art..I love them both..nicely done 🙂
thank you Miss Pretty pretty :))
OMG! Jinal! you made this look so easyy!!! its really prettyyy!!! and loved the detailed explanation you gave! you have a verryy steady hand!!!!! :D:*
thank you ik…..I am glad you liked it :-*
thank you Scarlett :heart: :heart: :))
:jaiho: :jaiho:
That nice! you are doing nice things!
Nail art is like a drug, when you begin you just can’t leave it 😉
I like your blog! 🙂
Hey.. Awesome yaar. It’s simple.. Yet so amzing.
This is the first time im visiting such kind of blog, but believe me.. M so very excited to use this..
Will try it today only.
Thanks sweety.