Hello, beauties!

Experimenting with your hairstyle is quite easy and it always gives us a gorgeous makeover. Since I was bored of my basic hair parting I wanted to try something new. That’s how I came up with this hairstyle that has the 90s zigzag parting vibes. This style used to be quite popular when I was a kid and I remember how I would struggle with it. But now, it’s super easy for me to create this look and you’ll also love it after this tutorial.
Step 1:
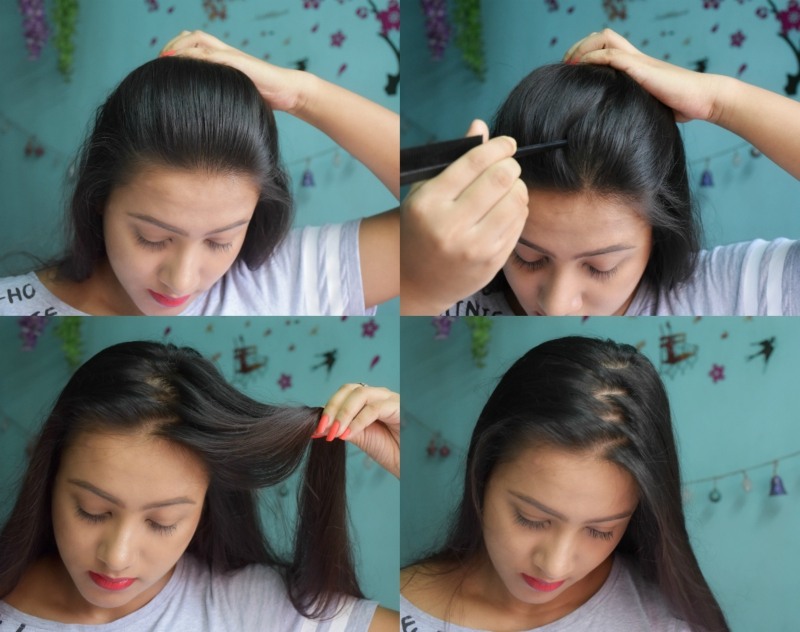
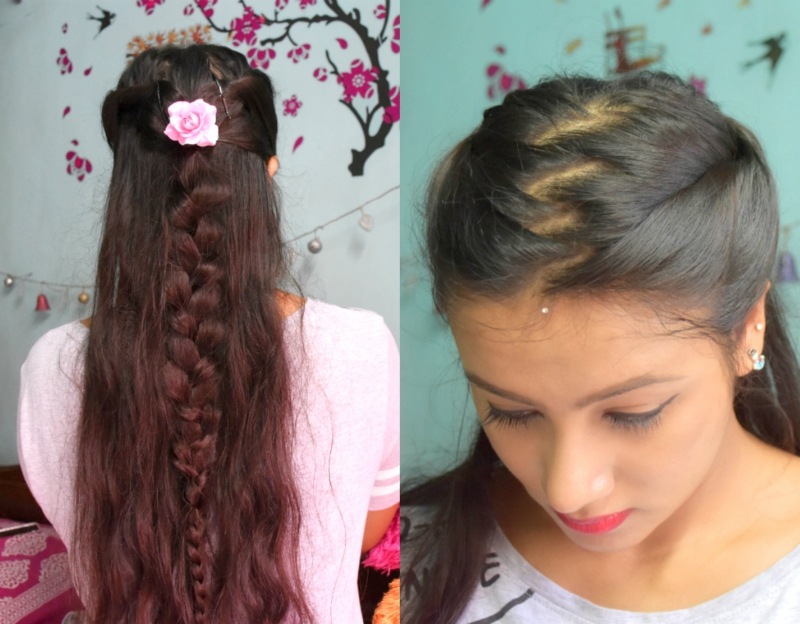
First, you need to brush your hair well and then comb the front section up. Then, take a tail comb and move the pointed end on your head in a zigzag motion. It is actually quite an easy trick.
Step 2:
After that, hold that tail on the head and move it to one side and normally part your hair with that comb. It is very simple and easy. The zigzag parting has already been created in your hair, you just need to part your hair.
Step 3:

Once you are done with the front sections, lightly brush the upper portion of your hair. Then, take a medium-sized section from the right side of the partition and twist it around. Take some hair again from the same side to give it a smoother, fuller look. Once you are done, secure your hair at the back with a pin.
Step 4:
Repeat the same step on your left side. Keep twisting and taking hair from the side to make your section thicker and fuller. Then, secure it at the back with a pin.
Step 5:
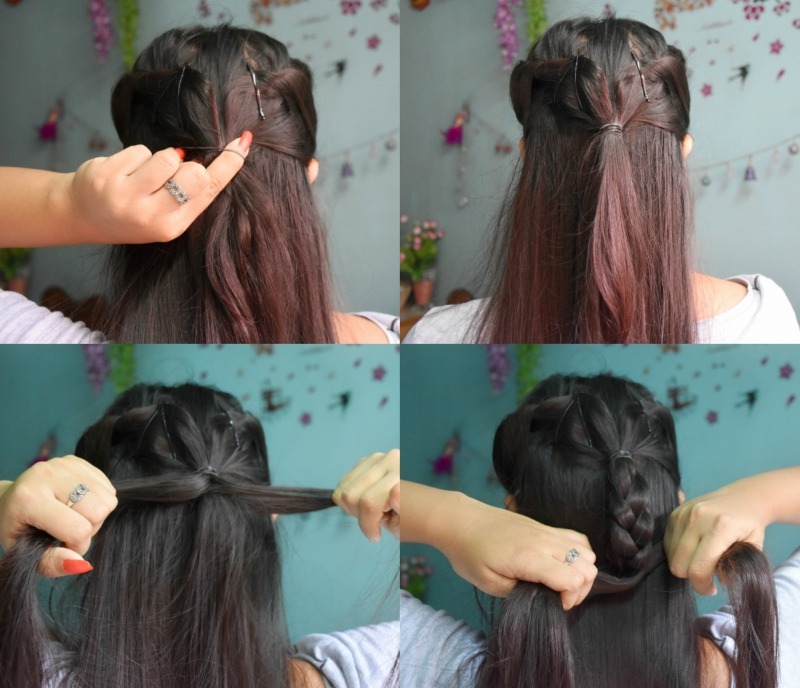
With those two twisted sections make a ponytail at the back and secure it with an elastic band. I took a little extra hair to make my braid look a little thicker.
Step 6:
After that you need to create a normal three-strand braid with the ponytail and continue until the end. Once again, secure the end with an elastic band.
Step 7:
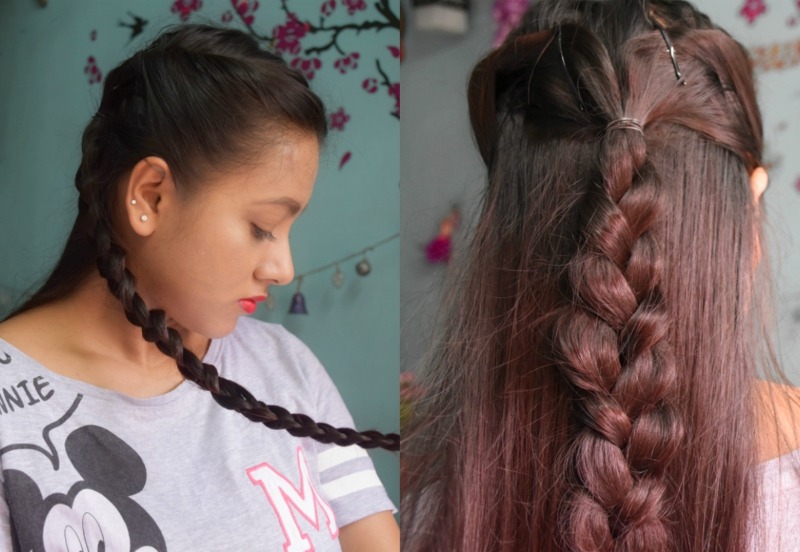
To add more volume, tug the braid a little and give it a nice fuller look. Also, tug the twisted section to loosen it up a bit.
Step 8:
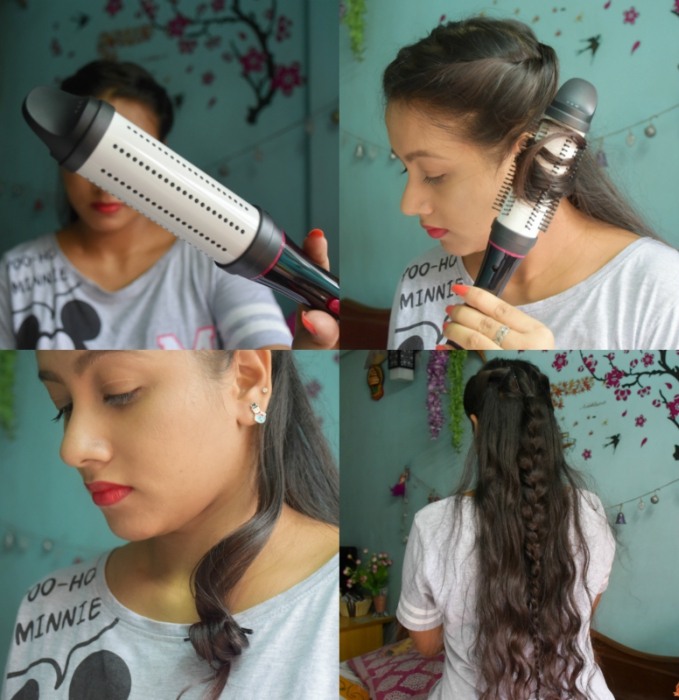
You can stop here and keep your hair simple and casual. But I created some loose waves with a big curler.
Step 9:
For this, you need to take a small section and wrap it around the curler and keep it for a few seconds. Then, remove your hair from the curler and hold the curl in your hand. To give a nice definition, pin up the curl for a few minutes and then loosen it up properly. This is an easy way to get soft curls.
Step 10:
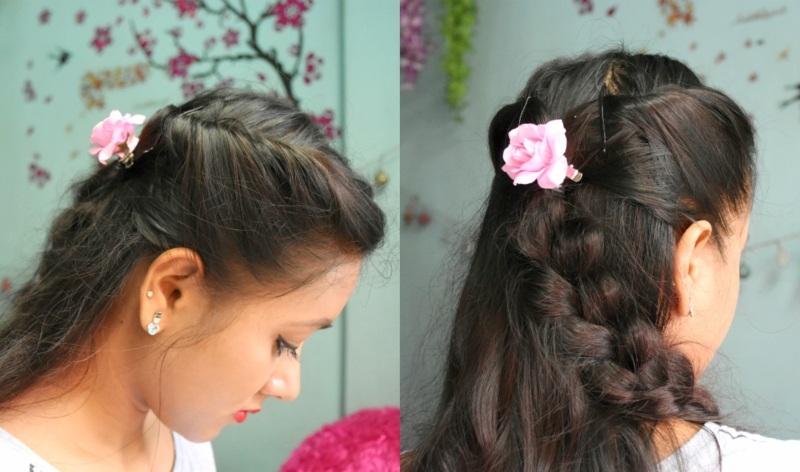
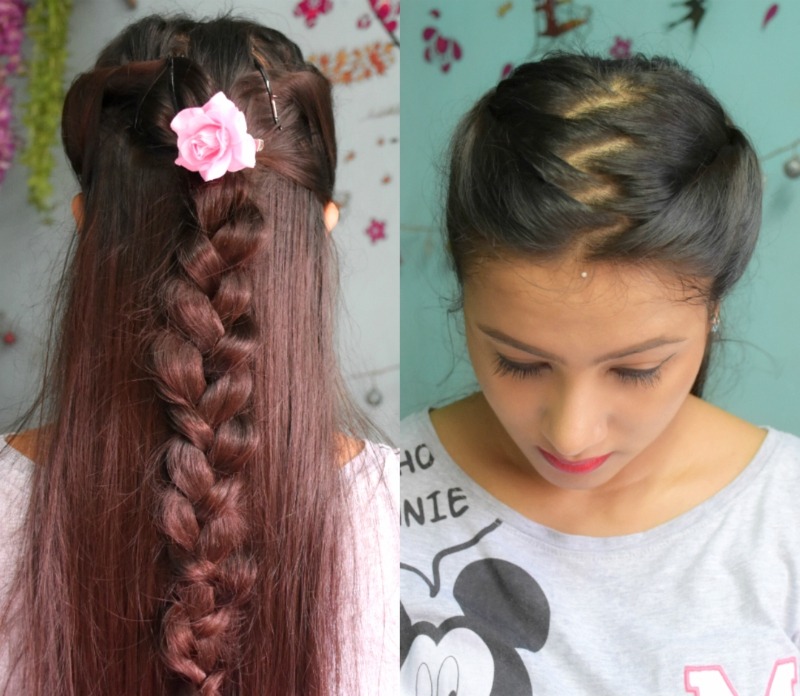
After completing the style, I added a pretty rose clip at the back where I made my ponytail. This is definitely an optional step but a hair accessory adds a pretty touch to any hairstyle. You can use a bow, too.

Here is my complete look. I kept my front section very simple. I just tugged my hair a little for a more casual look. This hairstyle is super easy to create and perfect for all occasions. Such hairstyles are perfect for summers and keep your hair away from the face, too. I kept my makeup very simple with this look. In fact, I didn’t use any makeup and just applied a pretty red lipstick.
Step-by-Step Hair Tutorial – Cute Messy Upside Down Normal Braid Bun
Step-by-Step Hair Tutorial – Soft Romantic Bubble Ponytail
Step-by-Step Hair Tutorial – Casual Long Fishtail Braid
Step-by-Step Hair Tutorial – Pretty Twisted Bun Hairstyle
Step-by-Step Hair Tutorial – How to get Heatless Soft Curls
Step-by-Step Hair Tutorial – 5 Minutes Easy Braid Wrapped Ponytail
10 Cute Hairstyles For Short Hair
My Signature Messy Bun Tutorial
8 Must-Know Tips for Parting Your Hair Right
How To Make Different Hair Parting Styles
Aqua Eyes Makeup, Braids and Tutorial
Makeup Look – Copper Eyes, Bright Lips, Braids