By “Isha Khanna – Makeup Artist“
If nothing else, then “black smokey eyes” works the best, and who doesn’t want to try a hand on it. Smokey eyes definitely is somewhat tricky though, but I am sure you guys can handle it really well with a little guidance.


OK OK! I know you all must be thinking how this tutorial relates to its heading when I am going on and on about black smokey eye and nothing about solving the problem of those who think their eyes look small after they apply makeup. Well, you will find the solution once you scroll down 😛
Also, I did not want to go old school way and show you a classic look. So, instead, I added up a little oomph with glitter (pearly effect) and made it look modern in a way.
So, let’s get started!
Step-By-Step Tutorial:
1. Apply primer (Painterly by MAC).
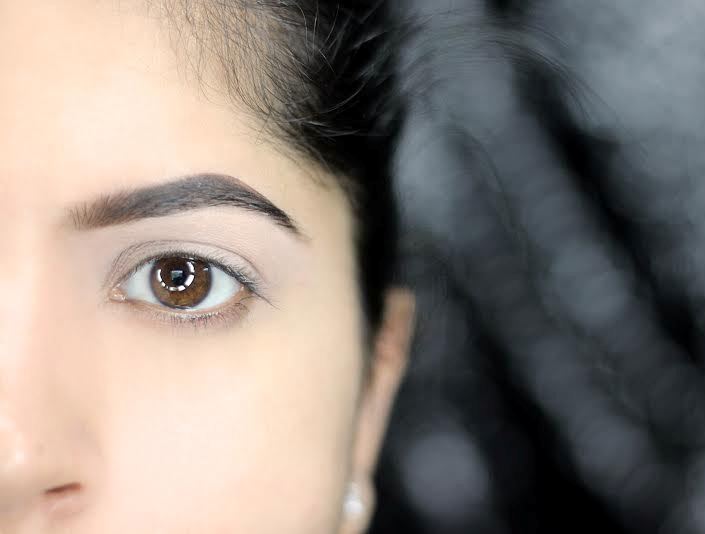
Slap on a little primer quickly. This one takes a few seconds to dry out completely and once dry, I can guarantee that it will never let your eye shadow crease.
2. Apply transition color into crease (Texture by MAC).
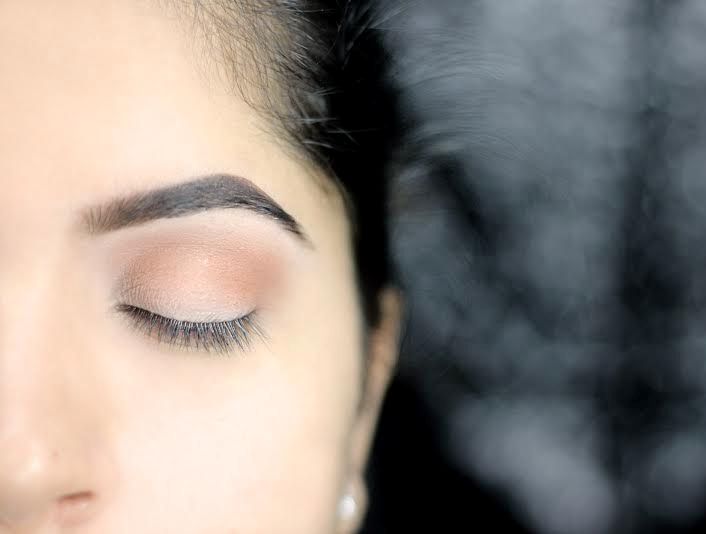
I am a big fan of this color. This has been my go-to shade since the beginning because it goes pretty well with almost every Indian skin tone hence I use it as my transition color. So, now all you have to do is apply this into the crease area and blend well. The key to every good looking eye make is to blend well. As they say, just when you think that you have blended enough, blend a little more 😛
3. Apply black eyeshadow on the lid (Coal from Morphe Brushes).
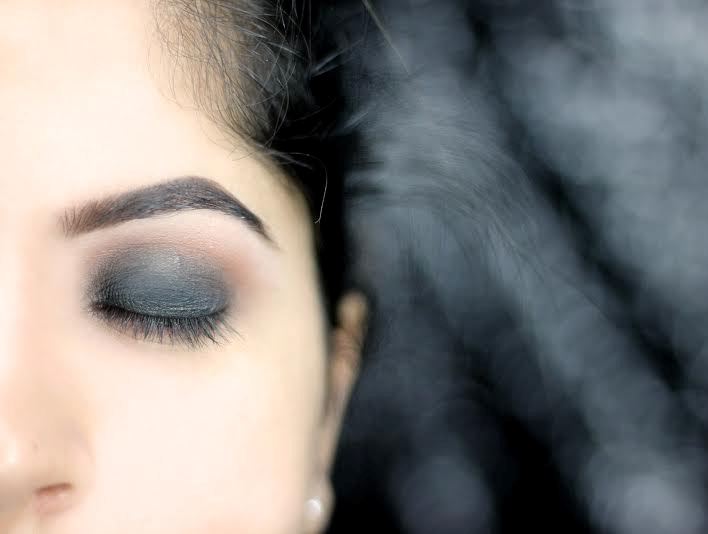
While applying the black shadow, you need to make sure that you don’t go above the socket line. Going above can make the makeup look ghostly. Once you have applied black, run the same brush that you used for “texture” on the visible end strokes of black to blend.
4. Use black on lower lash line (Coal from Morphe Brushes).

Sweep that same black color along the lower lash line. Keep the water line bare for now.
5. Blend black on the lower lash line and apply falsies (Coal from Morphe, Ardell Lashes).
Use “Texture” towards the end of black to blend and get rid of those hard edges. After that, I have applied the lashes, but they are definitely not mandatory if you don’t want them on. You can just go with loads of mascara.
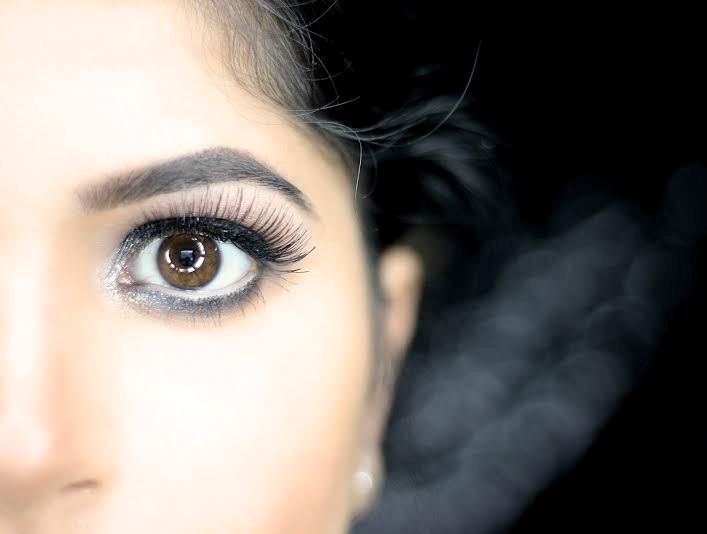
6. Pat some glitter in inner corners (3D Liquid Lustre by Lorac).
Apply any white/off-white color eye shadow to the innermost part of your lower lash line, just along the tear duct and then pat some glitter onto it.
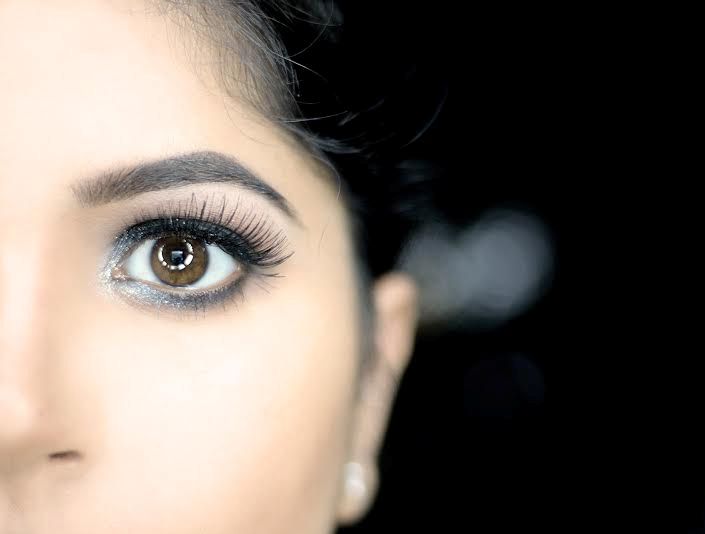
7. Apply white liner on the lower lash line (Anastasia Pro Pencil Base 1).
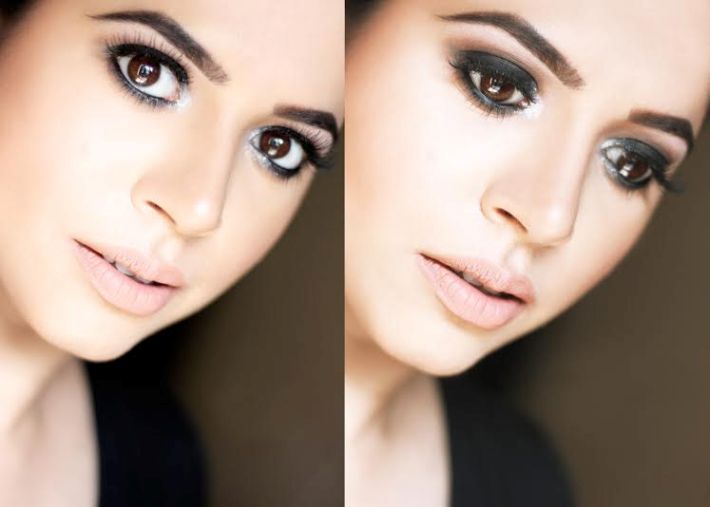
THE WAIT IS OVER! This is the part that all of you have been eagerly looking out for. Firstly, you need to make sure that your lower lash line is clear of black eyeshadow/mascara. Then, sweep on the Anastasia Pro Pencil along your water line. Doing this will instantly open up your eyes and make them look BIGGER.
8. If you don’t like to apply white liner, then use black (Inglot no 77).
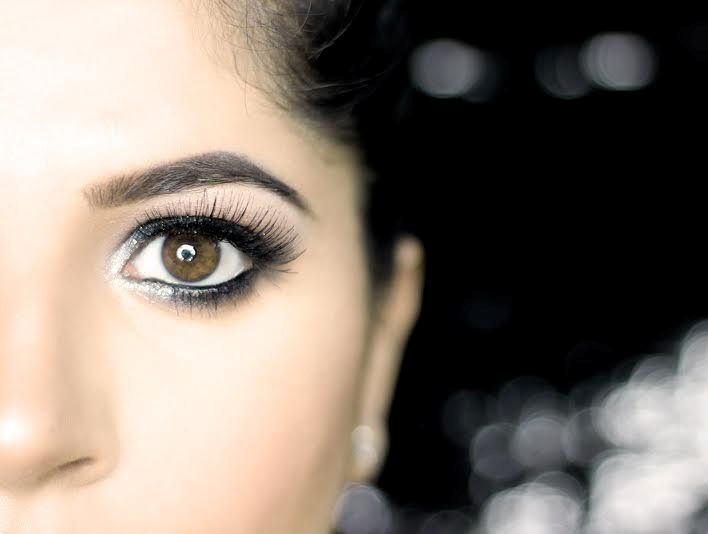
If white liner is not the thing for you, then just go with black. It will look equally good. Now, put on your favourite foundation, blush and lip gloss and YOU ARE DONE!
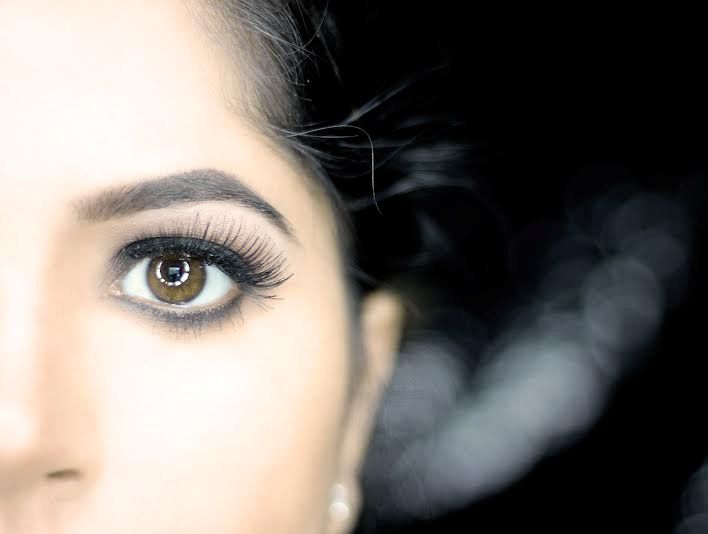
Here is the final look. But don’t lose interest just now, I still need to show you the difference between black and white liner by keeping both images against each other.
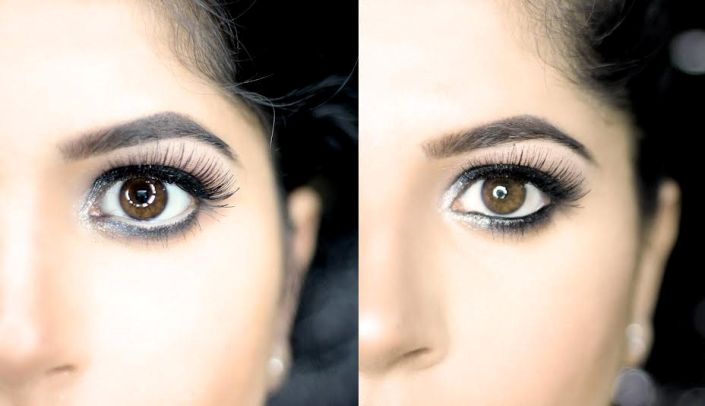
Just one simple trick and you are good to go.
I hope this tutorial was a great help to you. Let me know what you think 🙂 Tag me if you happen to try this out at home.
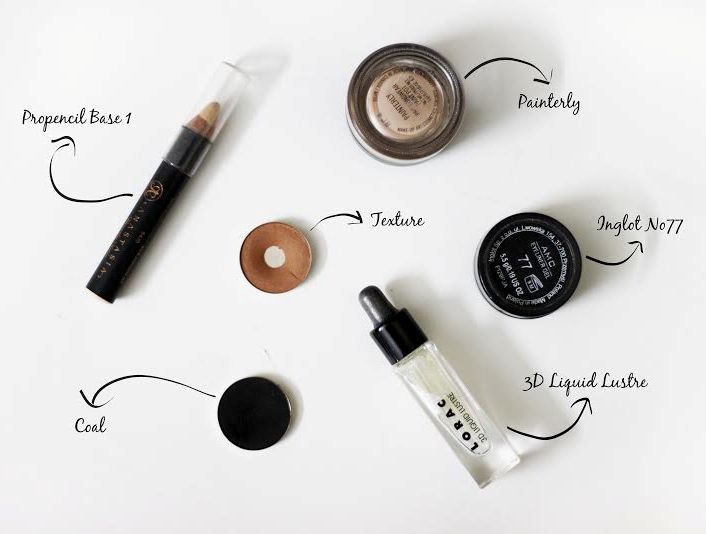
Products that I have used in this tutorial:
About the Makeup Artist:
“The best thing is to look natural, but it takes makeup to look natural.” – Calvin Klein
A dazzling bride or stunning diva, I Isha Khanna, can transform you into a gorgeous woman through the fine art of makeup. No more faux pas when it comes to makeup. From your hair to makeup, we handle it all. My entourage and I can travel anywhere to help you achieve the look you have always dreamt of.
Follow Isha Khanna on her social media accounts here:
Facebook: https://www.facebook.com/ishakhannamakeup/
Instagram: https://www.instagram.com/ishakhannamakeupartist/
Snapchat: isha.khanna
How To Hide Acne Scars and Blemishes with Makeup – Complete Makeup Tutorial
Step-by-Step Eye Makeup Tutorial – Blue Jewel Toned Smokey Eyes
Step-by-Step Makeup Tutorial – Sonakshi’s Smokey Eye Look
Step-by-Step Glittery Eye Makeup Tutorial for Wedding Functions
Step-by-Step Tutorial – Conceal Dark Circles in Just 5 Easy Steps
Easy Step-by-Step Tutorial for Purple-Plum Smokey Eyes
How to Create the Perfect Ombre Lips
Step-by-Step Bridal Makeup Tutorial – South Indian Muhurtham
How to Make Your Eyes Look Bigger
9 Make Up Tricks To Make Your Eyes Look Big!
8 Amazing Tricks to Add Drama to Big Eyes
How to Make Eyes Look Bigger


You do amazing makeup Isha 🙂 I am sure your clients leave with a big happy smile on your face, you are so awesome at it 🙂
Thank you soo much jomol. I am glad to have people who appreciate and encourage me.
absooolutely stunning esha. and the quality of your photos is so bang on. could you tell the number of the ardell lashes you have used here… you look gorgeous! looking forward for more. 🙂
Coming from you I feel all the more excited. Thank you for all the appreciation.
Lashes are 105 in Ardell.
Will be sending out more soon.
Very pretty Isha 🙂 you are perfect with this eye makeup I would love to be your client any day!! you luk lovely 🙂
Most welcome Neetu. It will be my pleasure ????????
Wow! Loved the tutorial! And the pics looks amazing! What camera do you use?
It’s Canon dslr 600D
You nailed simple, neat and sultry. The look and the presentation is perfect *thumbs up* and easy to follow 🙂 Looking forward for more tutorials from you Isha 🙂
You will get to see more soon!
Lovely! <3
Thank you????
This is gorgeous! *_*
Thank you????
Hi Isha,I have always struggled to create the perfect smokey eye but this makeup tutorial will surely help me to attain the smoked out look.This tutorial is amazing.Loved the clarity of the pictures and really liked the ease with which you explained all the steps.Thanks and please share some more makeup tutorials.
Try it and let me know how it worked for you. Questions are always welcomed. More coming up soon!
Stunner!! ♥ Absolutely loved the tutorial
☺️☺️
This looks absolutely amazing. Wedding party coming up n this I will try definitely 😀
Super!!! Let me know how it works out for you ????