Hi, beauties! 🙂

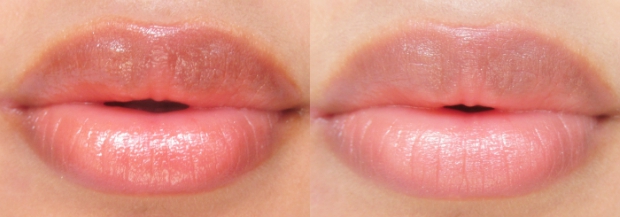
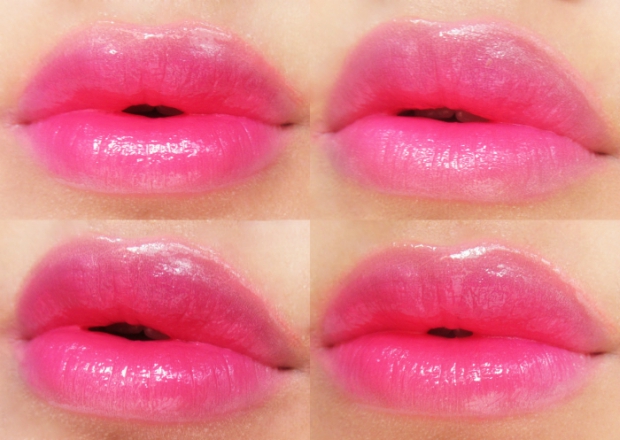
We all know about the lip gradation technique. It is quite popular these days and I absolutely love this look. It looks so cute and simple. The Korean lip gradation look is the most popular one and they have such pretty lips. But I tried this in my own way. Gradation means ombre lips, but in the sweetest way. It is the art of lip makeup which looks so fresh and pretty during summer. This technique gives a cute, soft and sexy lips effect which goes with every outfit. I prefer pink gradient lips with a cute winged eyeliner look. This combination keeps my makeup natural and fresh. Let’s get into the tutorial.
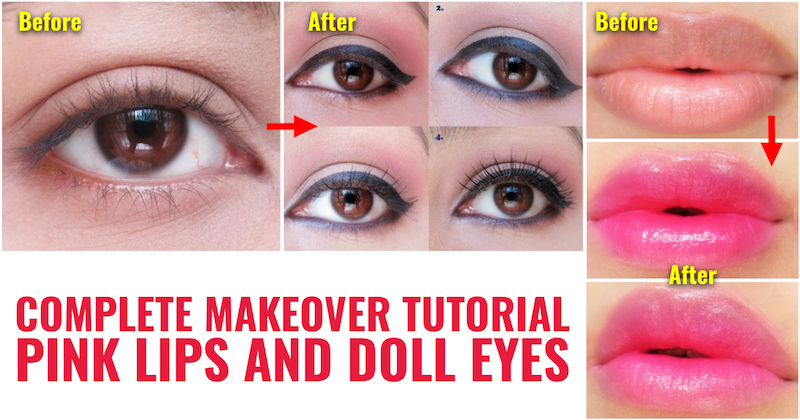
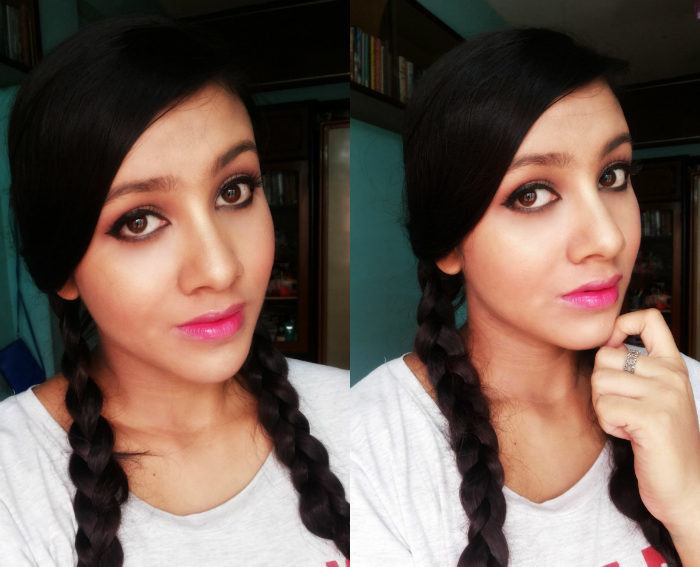
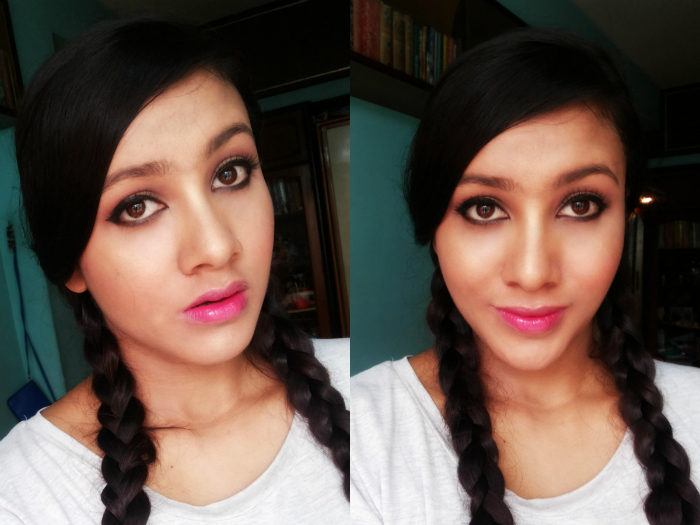
The look:
NOTE: I have listed down all the products I used below this tutorial and the products are backlinked to their reviews. 🙂
Step 1:
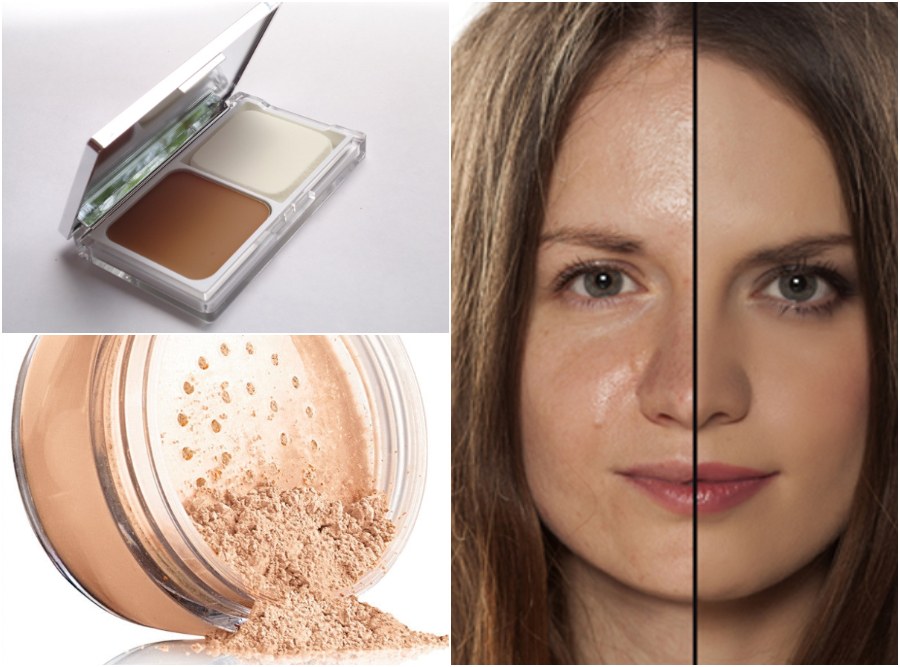
First, I applied the base all over my face and neck and then applied a concealer to correct my face. I also applied a dark concealer shade by Makeup Revolution London to contour my face. I set my face makeup with a compact.
Step 2:
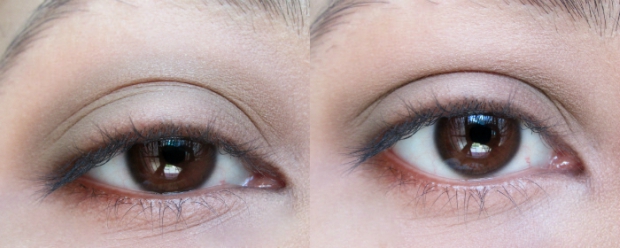
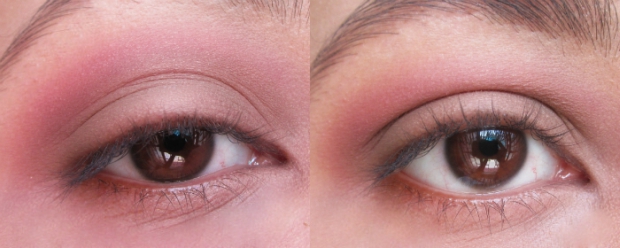
After I completed my basic face makeup, I started with my eye makeup. I applied an eyeshadow from Makeup Revolution on my crease. It is a natural brown shade which gives a nice and defined look to the eyes. I blended the shadow with a fluffy blending brush.
Step 3:
Next, I blended the brown shadow line with a light warm coral eye shadow by Miss Claire on the crease.
Step 4:
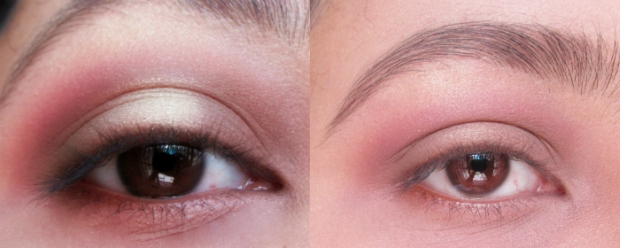
I kept blending until it turned into a soft look.
Step 5:
Now, I used a golden highlighter by Makeup Revolution as a shadow on the center of my lids and also on my brow bones and I lightly blended the harsh line with a small blending blush. Then, I defined my eyebrows.
Step 6:
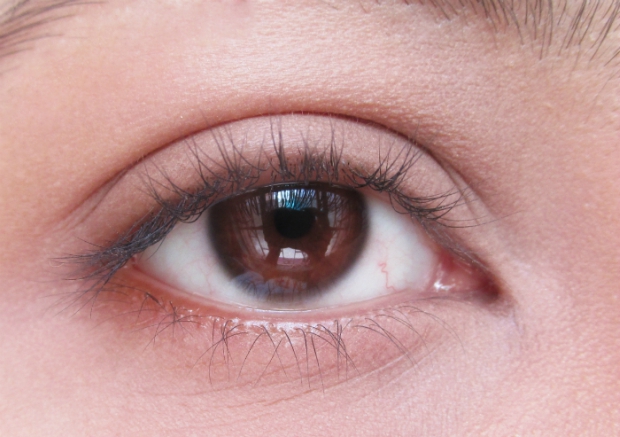
Next, with the help of an eyeliner, I drew a small cute winged line. Also, I applied a dark black kajal on my waterline.
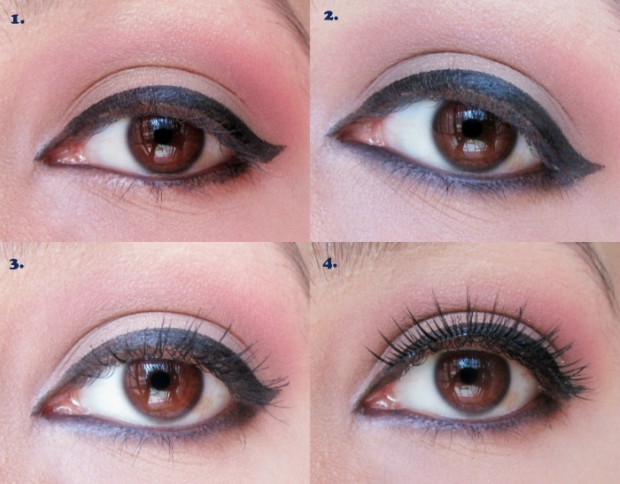
Step 7
With a small blending brush, I smudged the lower lash line a little to make it look more natural.
Step 8:
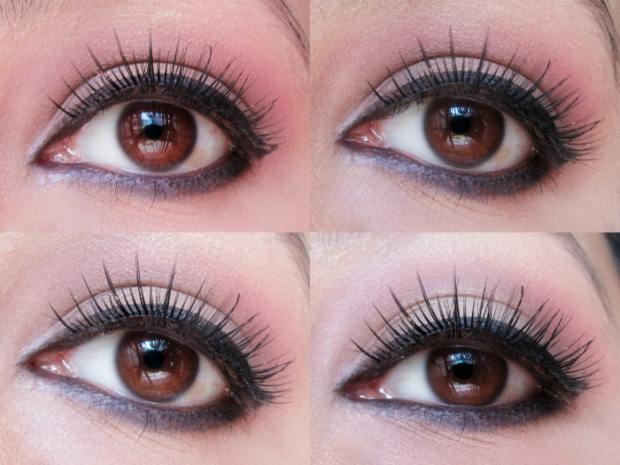
Then, I curled my eyelashes and applied a mascara on my lashes. For this look, I used false lashes on my eyes. I used the same kajal on my lower lash line to make the look a little more bold.
Step 9:
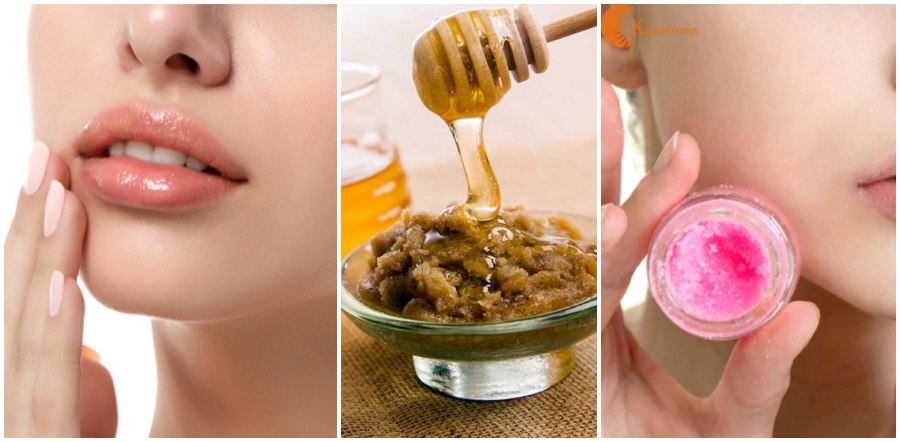
After I completed my eye makeup, I prepared my lips with a hydrating long lasting lip balm. I had also exfoliated my lips before starting my makeup.
Step 10:
Then, I concealed my lips and the area around my lips with a concealer stick. I blended all the concealer with a Beauty Blender. It gave a smooth and even application. After that, I wiped off the excess product from the center of my lips.
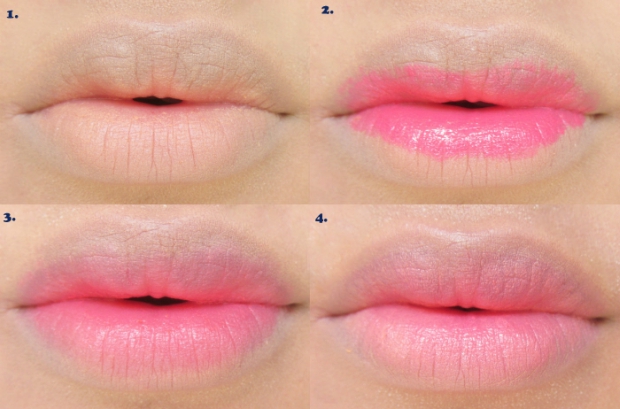
Step 11:
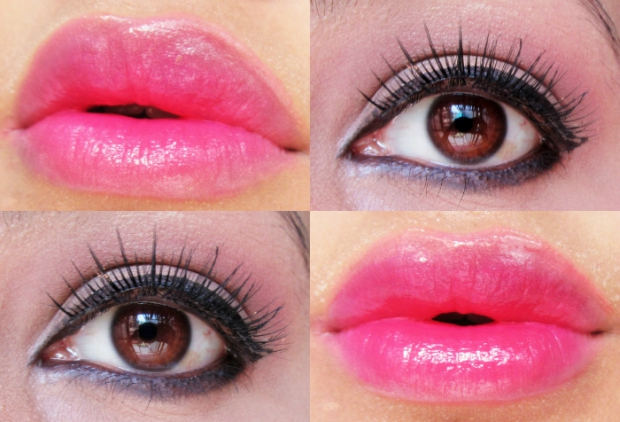
Next, I applied a neon pink lipcolor by Maybelline, but only on the center of my lips. And then, I smudged the shade on upper lip in an upward way and on the lower lip in a downward way with a small detailing brush. I smudged it until it became a soft pink color.
Step 12:
Now, you need to apply a darker shade. So, I again applied a deep fuchsia pink shade by Maybelline on the center of my lips and blended the outer line lightly in the same upward and downward way. But don’t smudge it all over your lips. Just smudge the harsh lines.
Step 13:
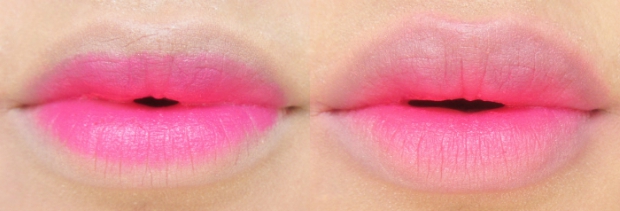
After that, I again dabbed the same lipstick lightly on the center of my lips to make the color appear deeper. Next, I applied a smooth pink lip gloss all over my lips. Don’t drag it too much; just apply it lightly.
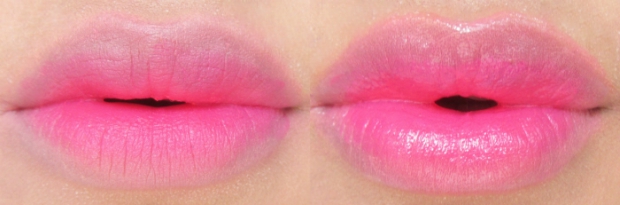
Step 14:
Next, I applied a lip glaze just on the center of my lips to highlight them more. Then, applied some compact around the lip line to make the application more prominent.
Step 15:
Coming back to the face, I skipped my powder contour or bronzer to keep my makeup natural. I applied a pretty coral blush on my cheeks and concentrated more on highlighting my face. I applied a highlighter on the highest points of my face. Lastly, I fixed my makeup with a makeup fixing spray.
Products Used:
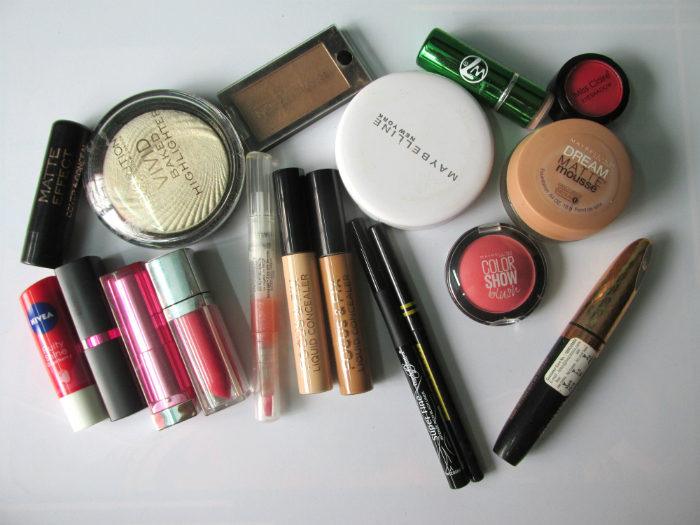
Eyes:
Makeup Revolution London Mono Eyeshadow Pure
Miss Claire Eyeshadow 0514
Diana of London Super Fine Intense Rich Black Liner 01 Black
Maybelline Colossal Super Black Kajal
Rimmel Glam’ Eyes Lash Flirt Volume & Lift mascara- Kohl Black
Maybelline Master Shape Deep Brown Brow Pencil
Face:
Maybelline Dream Matte Mousse – Sandy Beige Medium1
Makeup Revolution London Focus & Fix Liquid Concealer – 03 light & 11 Dark
Maybelline White Super fresh Compact – Coral
Makeup Revolution London The Matte Effect Cover and Conceal– Darkest 12
Maybelline Color Show Blush – Fresh Coral
Makeup Revolution London Vivid Baked Highlighter Golden Light
Lips:
W7 Tea Tree Concealer – Light
Nivea Fruity Shine Strawberry Lip Balm
Maybelline Pink Alert by Color Sensational Lipstick – POW4
Maybelline Color Show creamy Matte Lipstick Flaming Fuchsia
Maybelline Lip Polish Glam2
Stila Kaleidoscope Lip Glaze
I hope this tutorial is helpful for you. It is a very cute look which you can easily carry. It is so easy to create and is the perfect look for summers. You can create this in your own way. Enjoy. 🙂
More Makeup Tutorials:
Step-by-Step Makeup Tutorial – Purple Smoky Eyes with Bold Wine Lips
Step by Step Makeup Tutorial of Sun Kissed, Gold Winged Look
Step-by-Step Makeup Tutorial – Metallic Smokey Eyes
Makeup Tutorial – Aishwarya Rai Cannes 2016 Inspired Makeup Look
Step-by-Step Makeup Tutorial – Sharp Edged Cat Smokey Eyes
How To Make Your Eyes Look Bigger With Makeup – Tutorial
How To Hide Acne Scars and Blemishes with Makeup – Complete Makeup Tutorial
Step-by-Step Eye Makeup Tutorial – Blue Jewel Toned Smokey Eyes
Step-by-Step Makeup Tutorial – Sonakshi’s Smokey Eye Look
Step-by-Step Glittery Eye Makeup Tutorial for Wedding Functions
Step-by-Step Tutorial – Conceal Dark Circles in Just 5 Easy Steps
Easy Step-by-Step Tutorial for Purple-Plum Smokey Eyes
How to Create the Perfect Ombre Lips
Step-by-Step Bridal Makeup Tutorial – South Indian Muhurtham
How to Make Your Eyes Look Bigger


aww you look like doll chayanti. what an absolutely fabulous tutorial!! loved every bit of it. sooo soo pretty you look. 🙂
Thank you soo much mam… 🙂
Wow !! You totally nailed the lips. So beautiful. You look like a doll indeed !! Loved the tutorial. Keep sharing such lovely tutes!
Thank you Priyanka and definitely will do more tutorials 😛 I love to share with you girls 🙂
Lovely tutorial and well explained! 😀
Thanks a ton 🙂 🙂
Me want those lips ? Fabulous look 🙂
Ha ha, Thank you 😛 😛
Wow…you are looking so pretty-pretty. Nice tutorial.. 🙂
Thanks a lot Palak.. 🙂 🙂
You really look like a pretty doll.. loved the tutorial 🙂
Aww.. thank you..:) 🙂
Chayanti, this look is so very cute :-*
Thank you so much sweety.. 🙂 🙂 🙂